props

Roman breastplate

In September 2018 I made this Roman breastplate for The Fool Factory for the National Museum of Australia’s exhibition Rome:City and Empire. The Caesar character was used as a living statue performer, intended to reflect the Roman statues in the exhibition. The costume also included a laurel wreath and Roman sandals.

Assorted props and costume elements

Here are a few photos of costume elements and props I’ve made for The Fool Factory over the last couple of years.

A new cover for the Giant Cherry! I love this photo because it looks completely photoshopped and surreal but isn’t. Finding the right fabric and colour is always challenging…

A giant Allen key in progress. This was for a prop for a gig at the opening of the Canberra IKEA store.

A hat and epaulettes for a Christmas Toy Soldier character.

New decorative leaf collar for the Sunflower Character.

A new body suit and colours for the Black Butterfly character. This is the front and head.

And this shows a side and back view.

And a big ruff for a scary Jack in the Box character for Halloween.

Light-up emu egg prop

20131013-204853.jpg

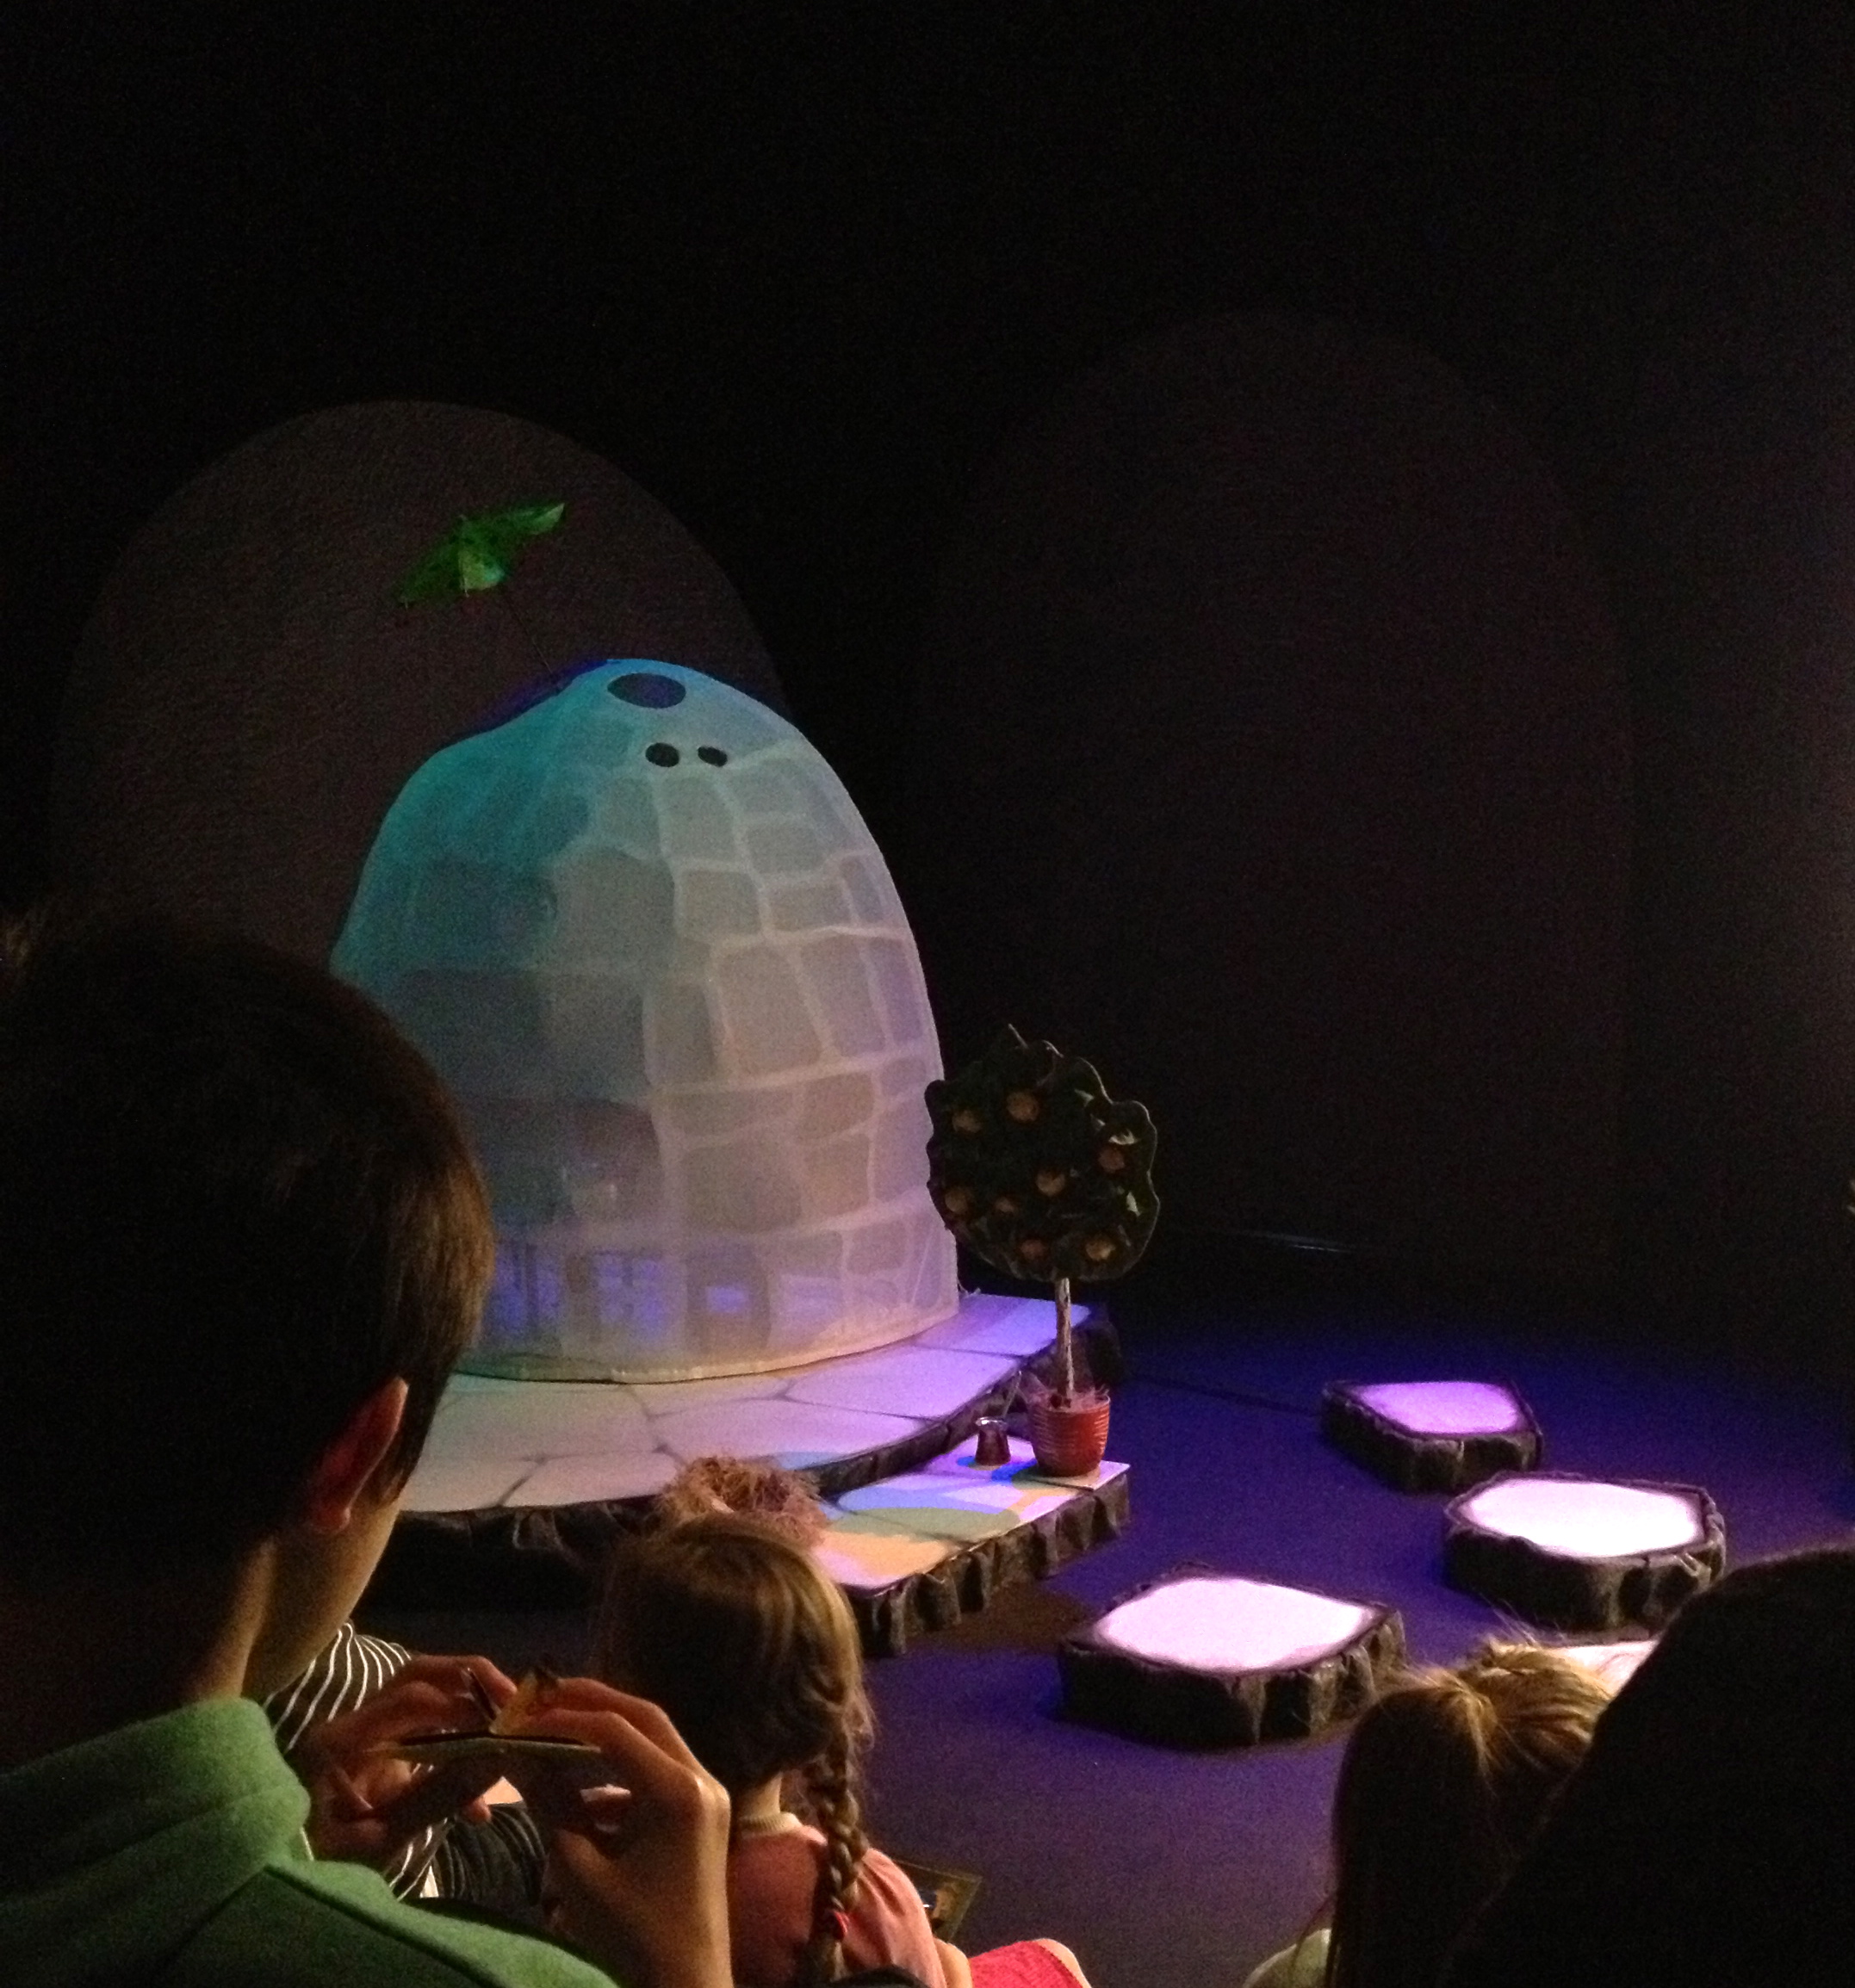
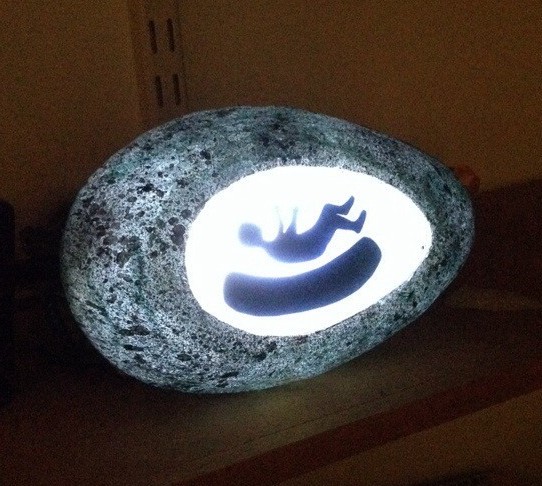
This is the finished emu egg prop made for BiamiThe story recounts how Biami ‘created the emu Dinnawhan, the female emu, whose spirit he used to create the Wiradjuri people; who now believe they are of the egg of Biami and the female spirit’. This is symbolised by the shadow of a baby in the coolamon within.

The egg is made from Plastimake, small pellets of plastic which soften when heated and can then by modeled. I this kind of plastic at Philip Millar’s puppet doctor session at the puppetry conference in Melbourne last year, and have been itching to have a good reason to use it! Peter, who I contacted at Plastimake, was very helpful, and it turned out to be a great material for this project.

I found it quite tricky to think through the various steps in how to make this, as it had to light up from inside but be self-contained, and you have to be able to access the batteries so they can be changed.

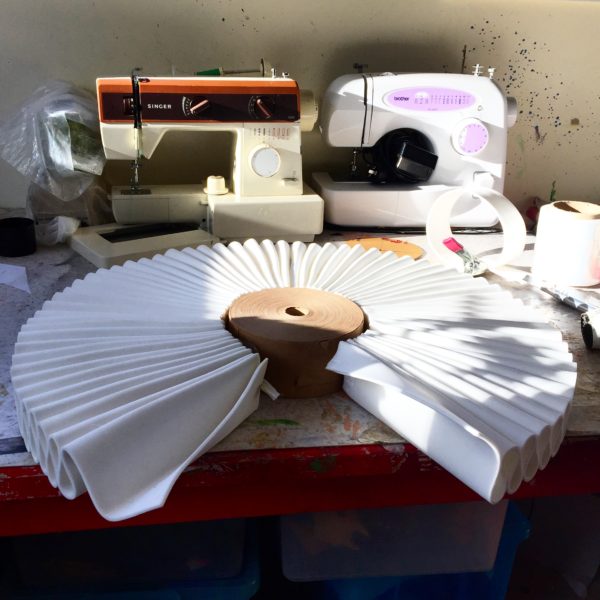
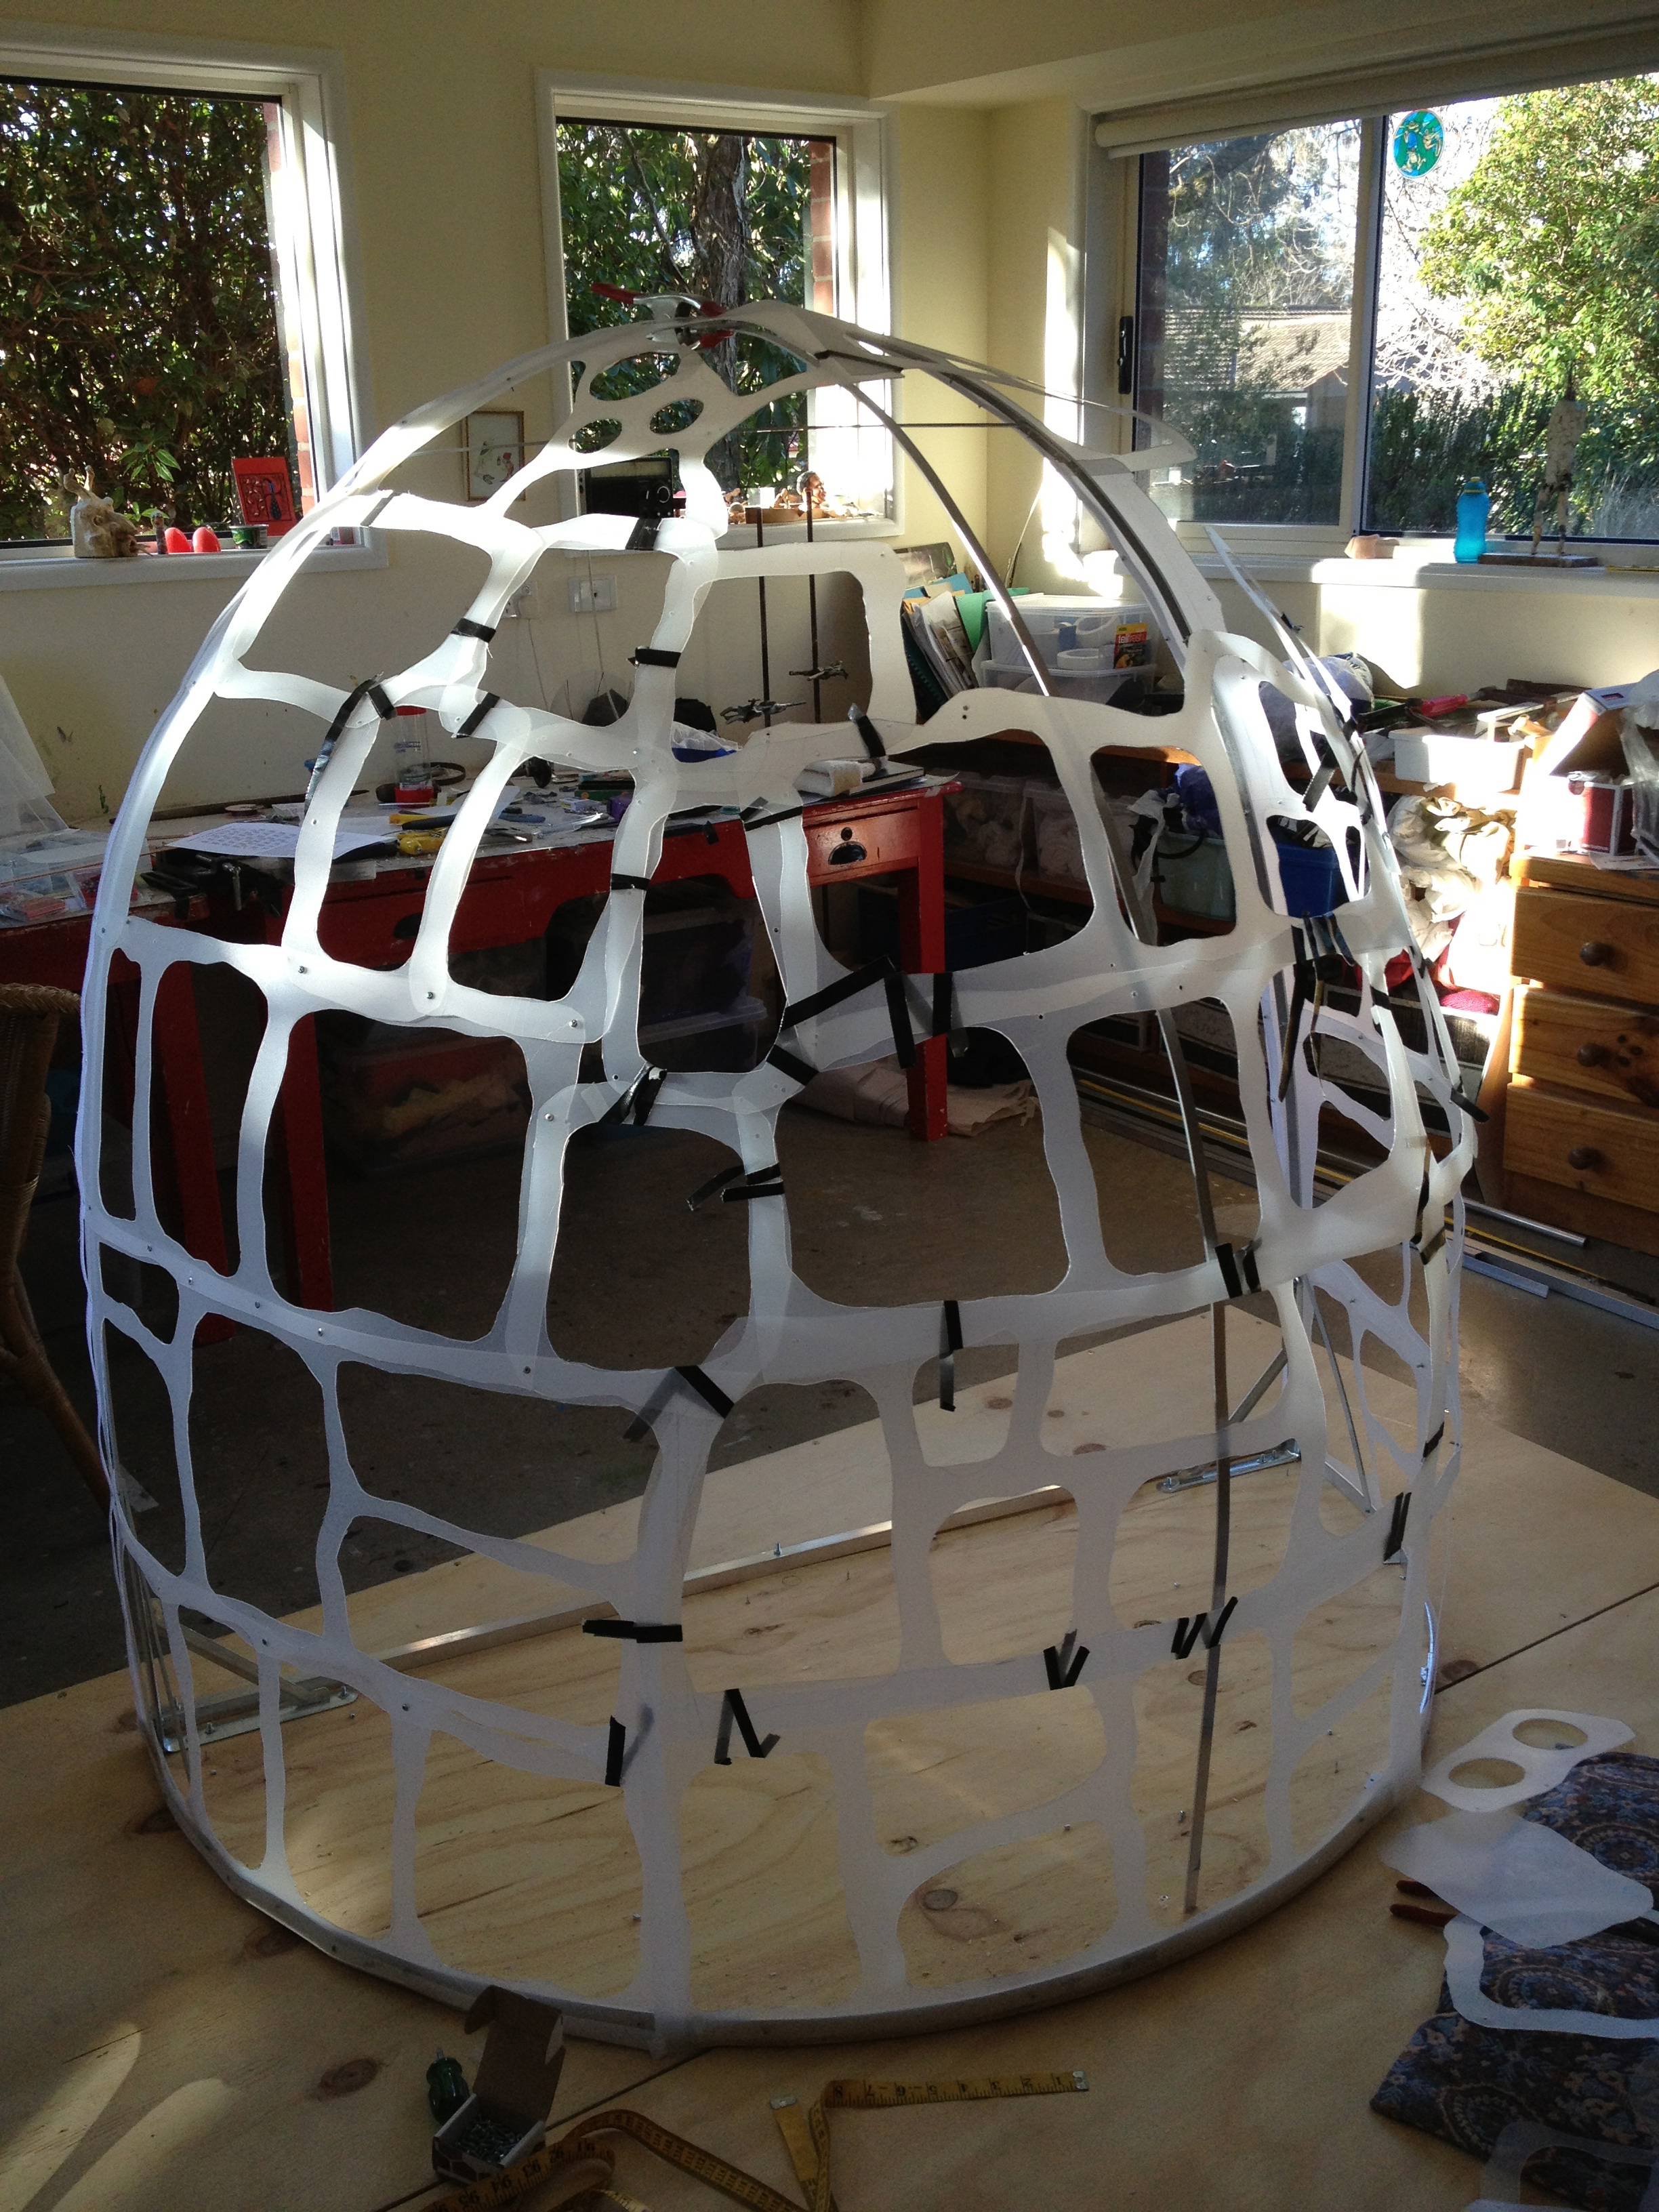
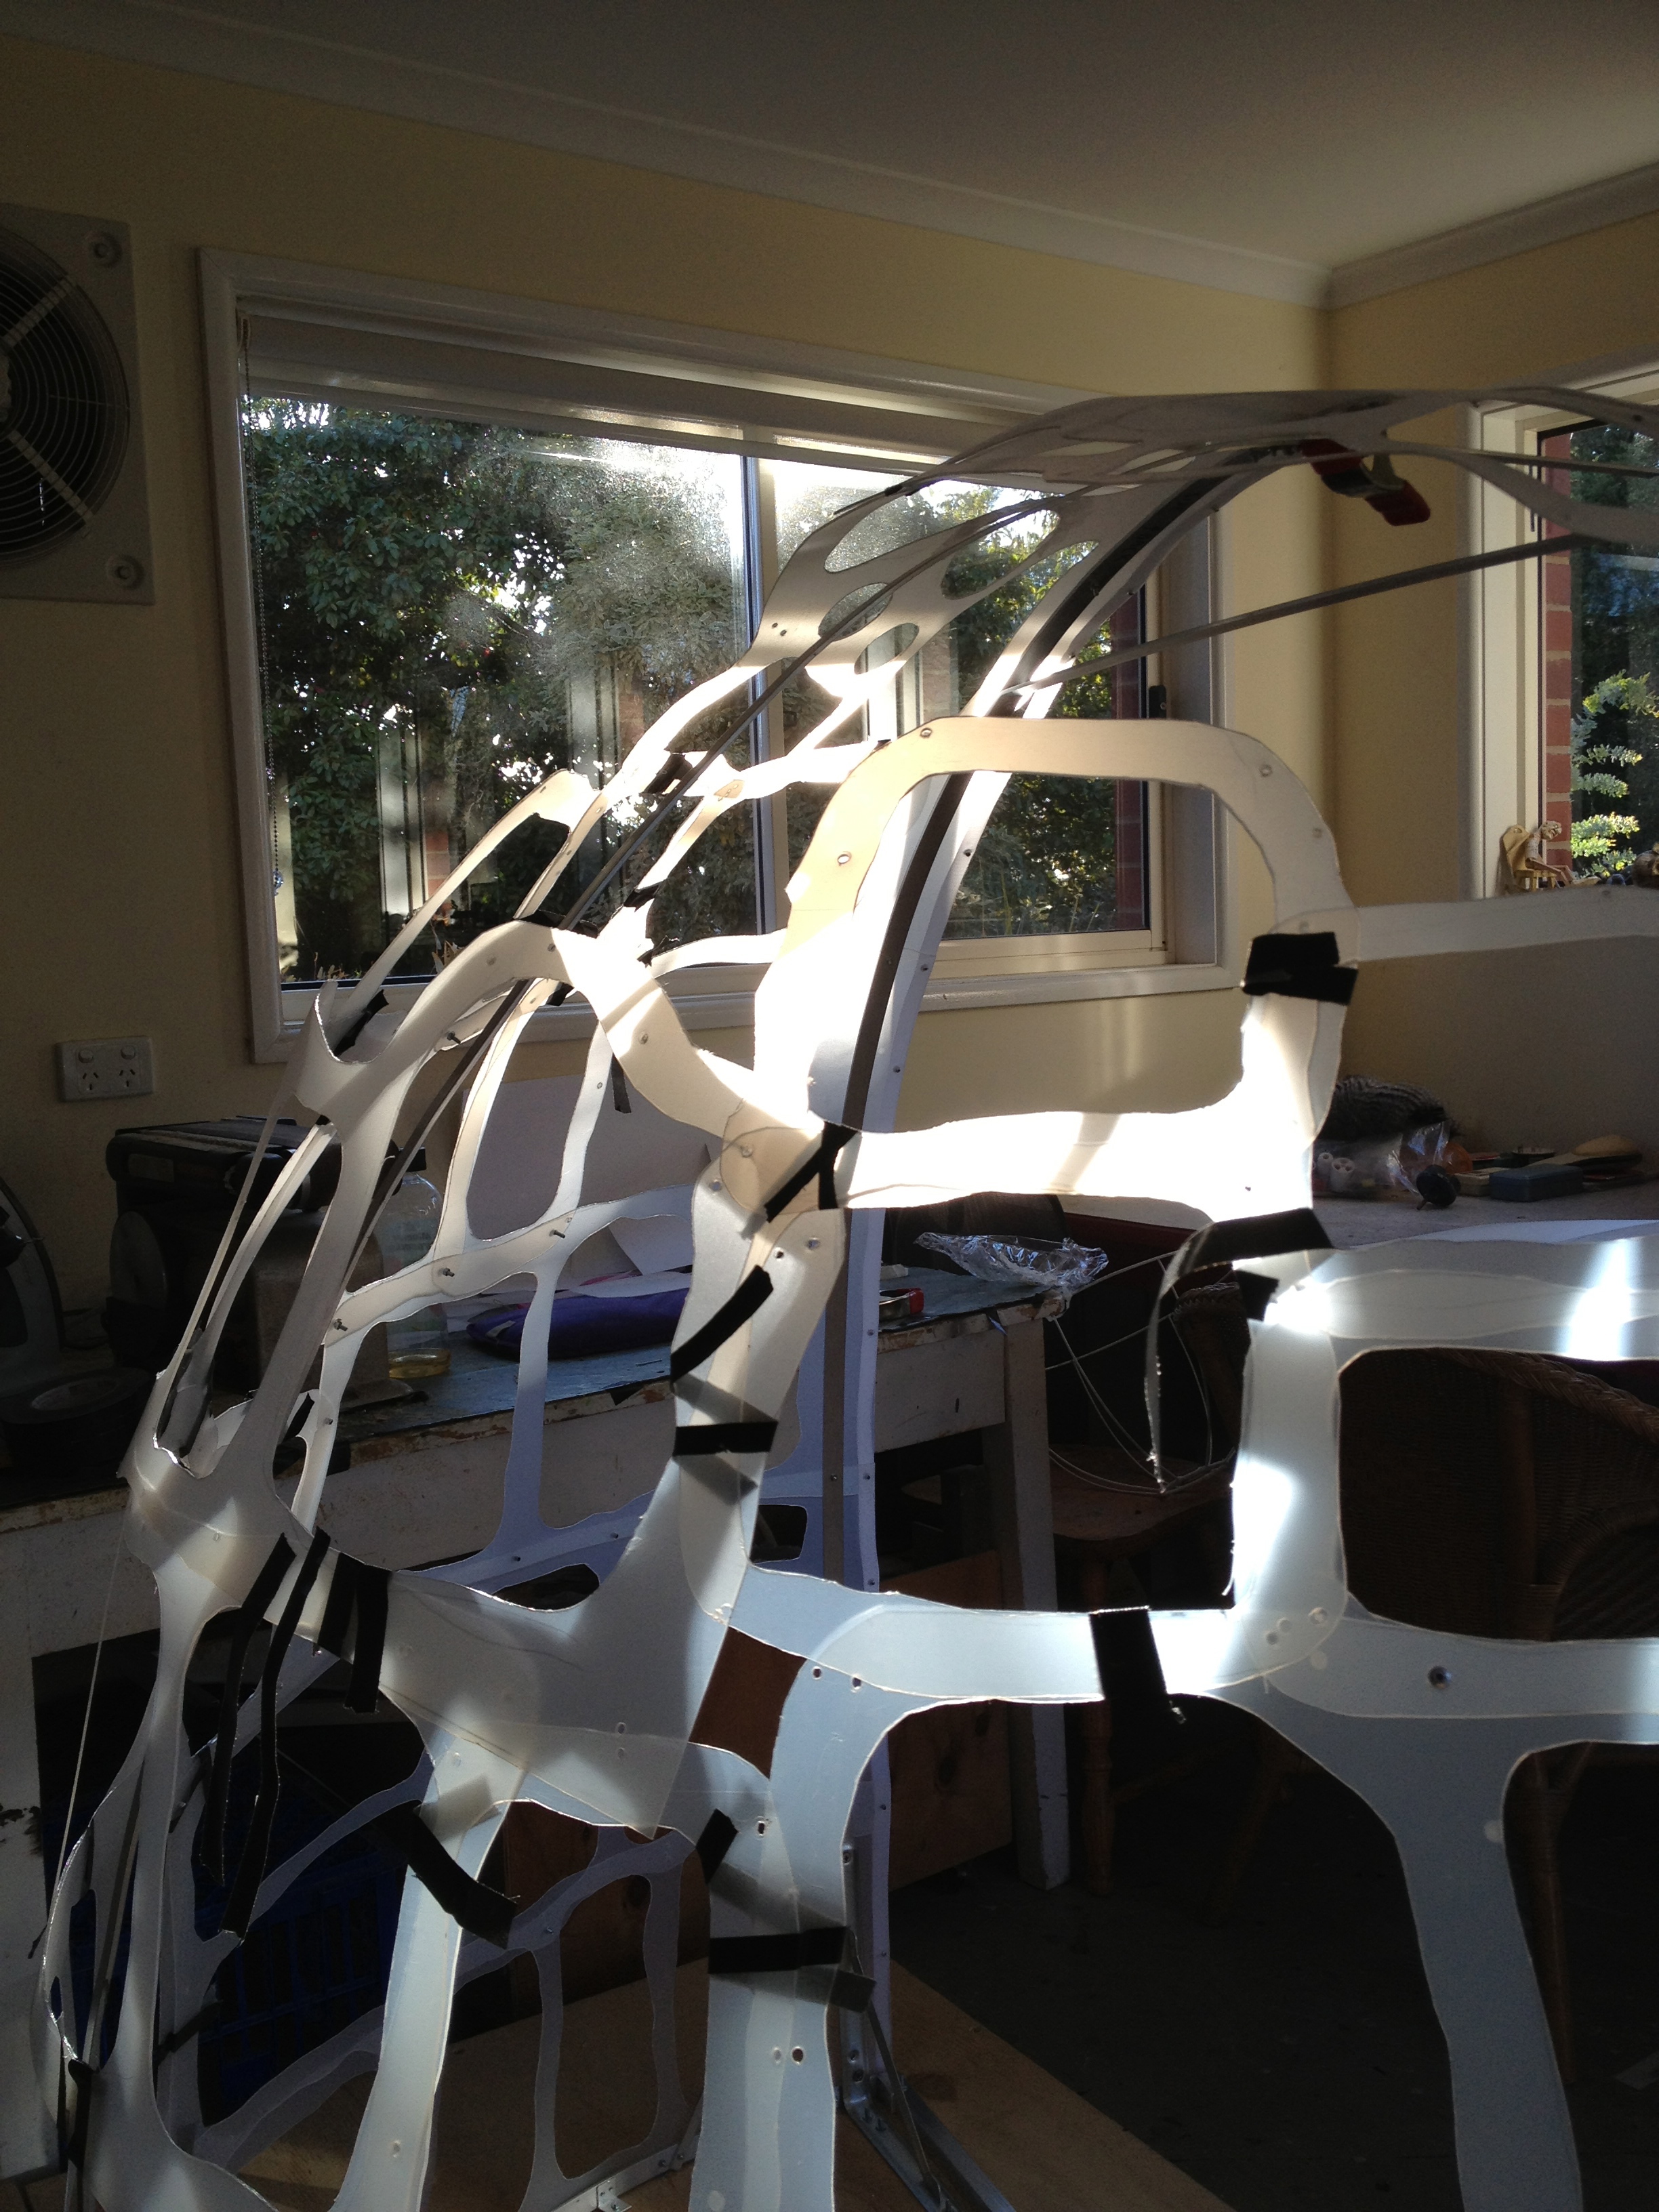
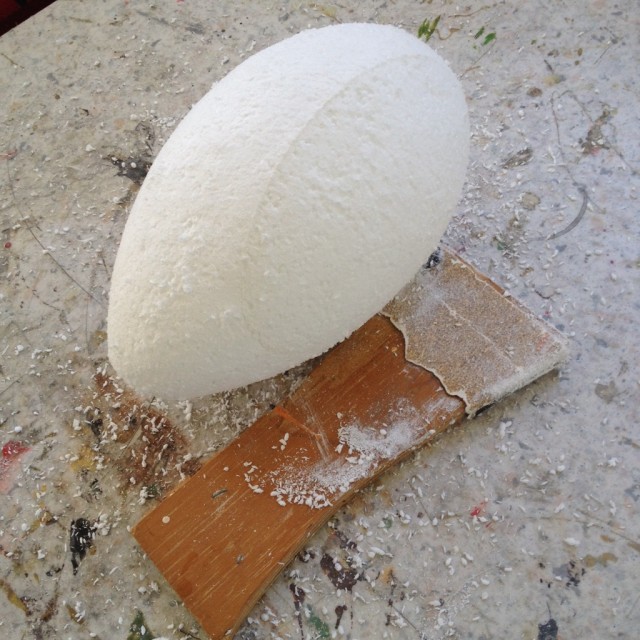
I started by making a polystyrene egg about 20 cm long as a former. Here it is with Special Tool A, a bit of plywood with some blunt sandpaper gaffered onto it, which happens to be ideal for smoothing  polystyrene once you have carved to roughly the right shape. Then I cut the egg in half lengthwise and put a bit of polypropylene in between so that I could later split the egg in half easily, and also cut away a small section at each end so that the ends would end up thick enough to hold screws to keep the two halves together.

20131013-204642.jpg

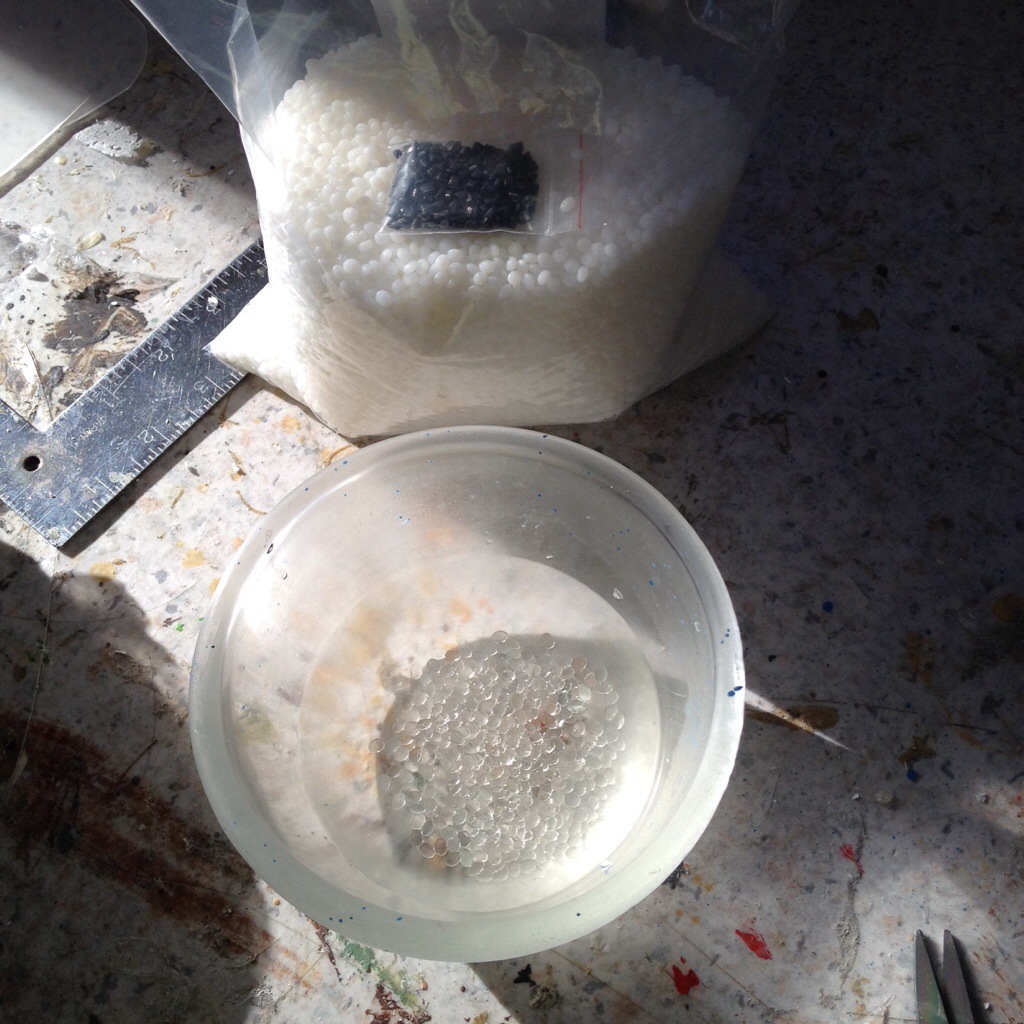
I used small quantities of Plastimake, heated in boiling water. The pellets turn transparent when they are hot enough to fuse, and then you can fish them out with a spoon and mold them to shape. I found that squishing them together a bit with the spoon while they were still in the water was a good idea too. (The little bag of black pellets are colouring pellets of Plastimake which I didn’t end up needing).

20131013-204711.jpg

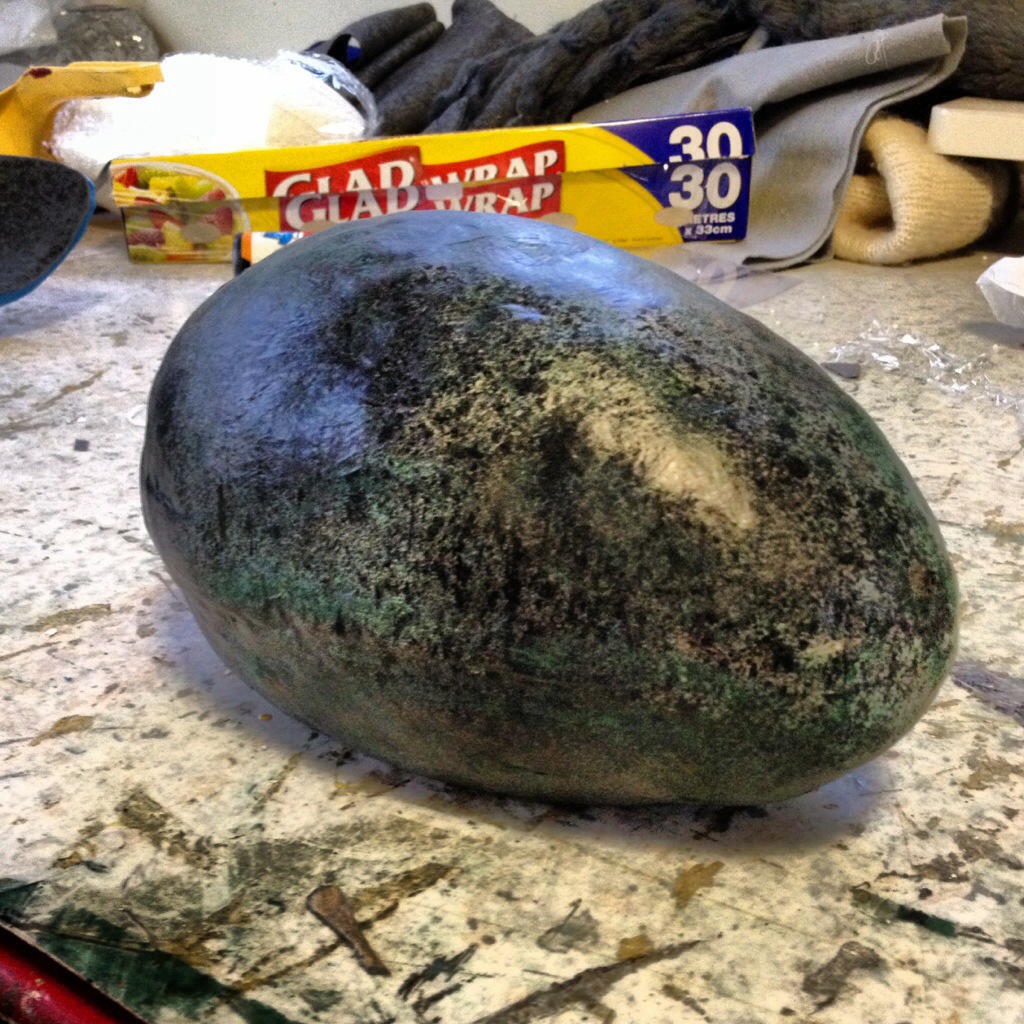
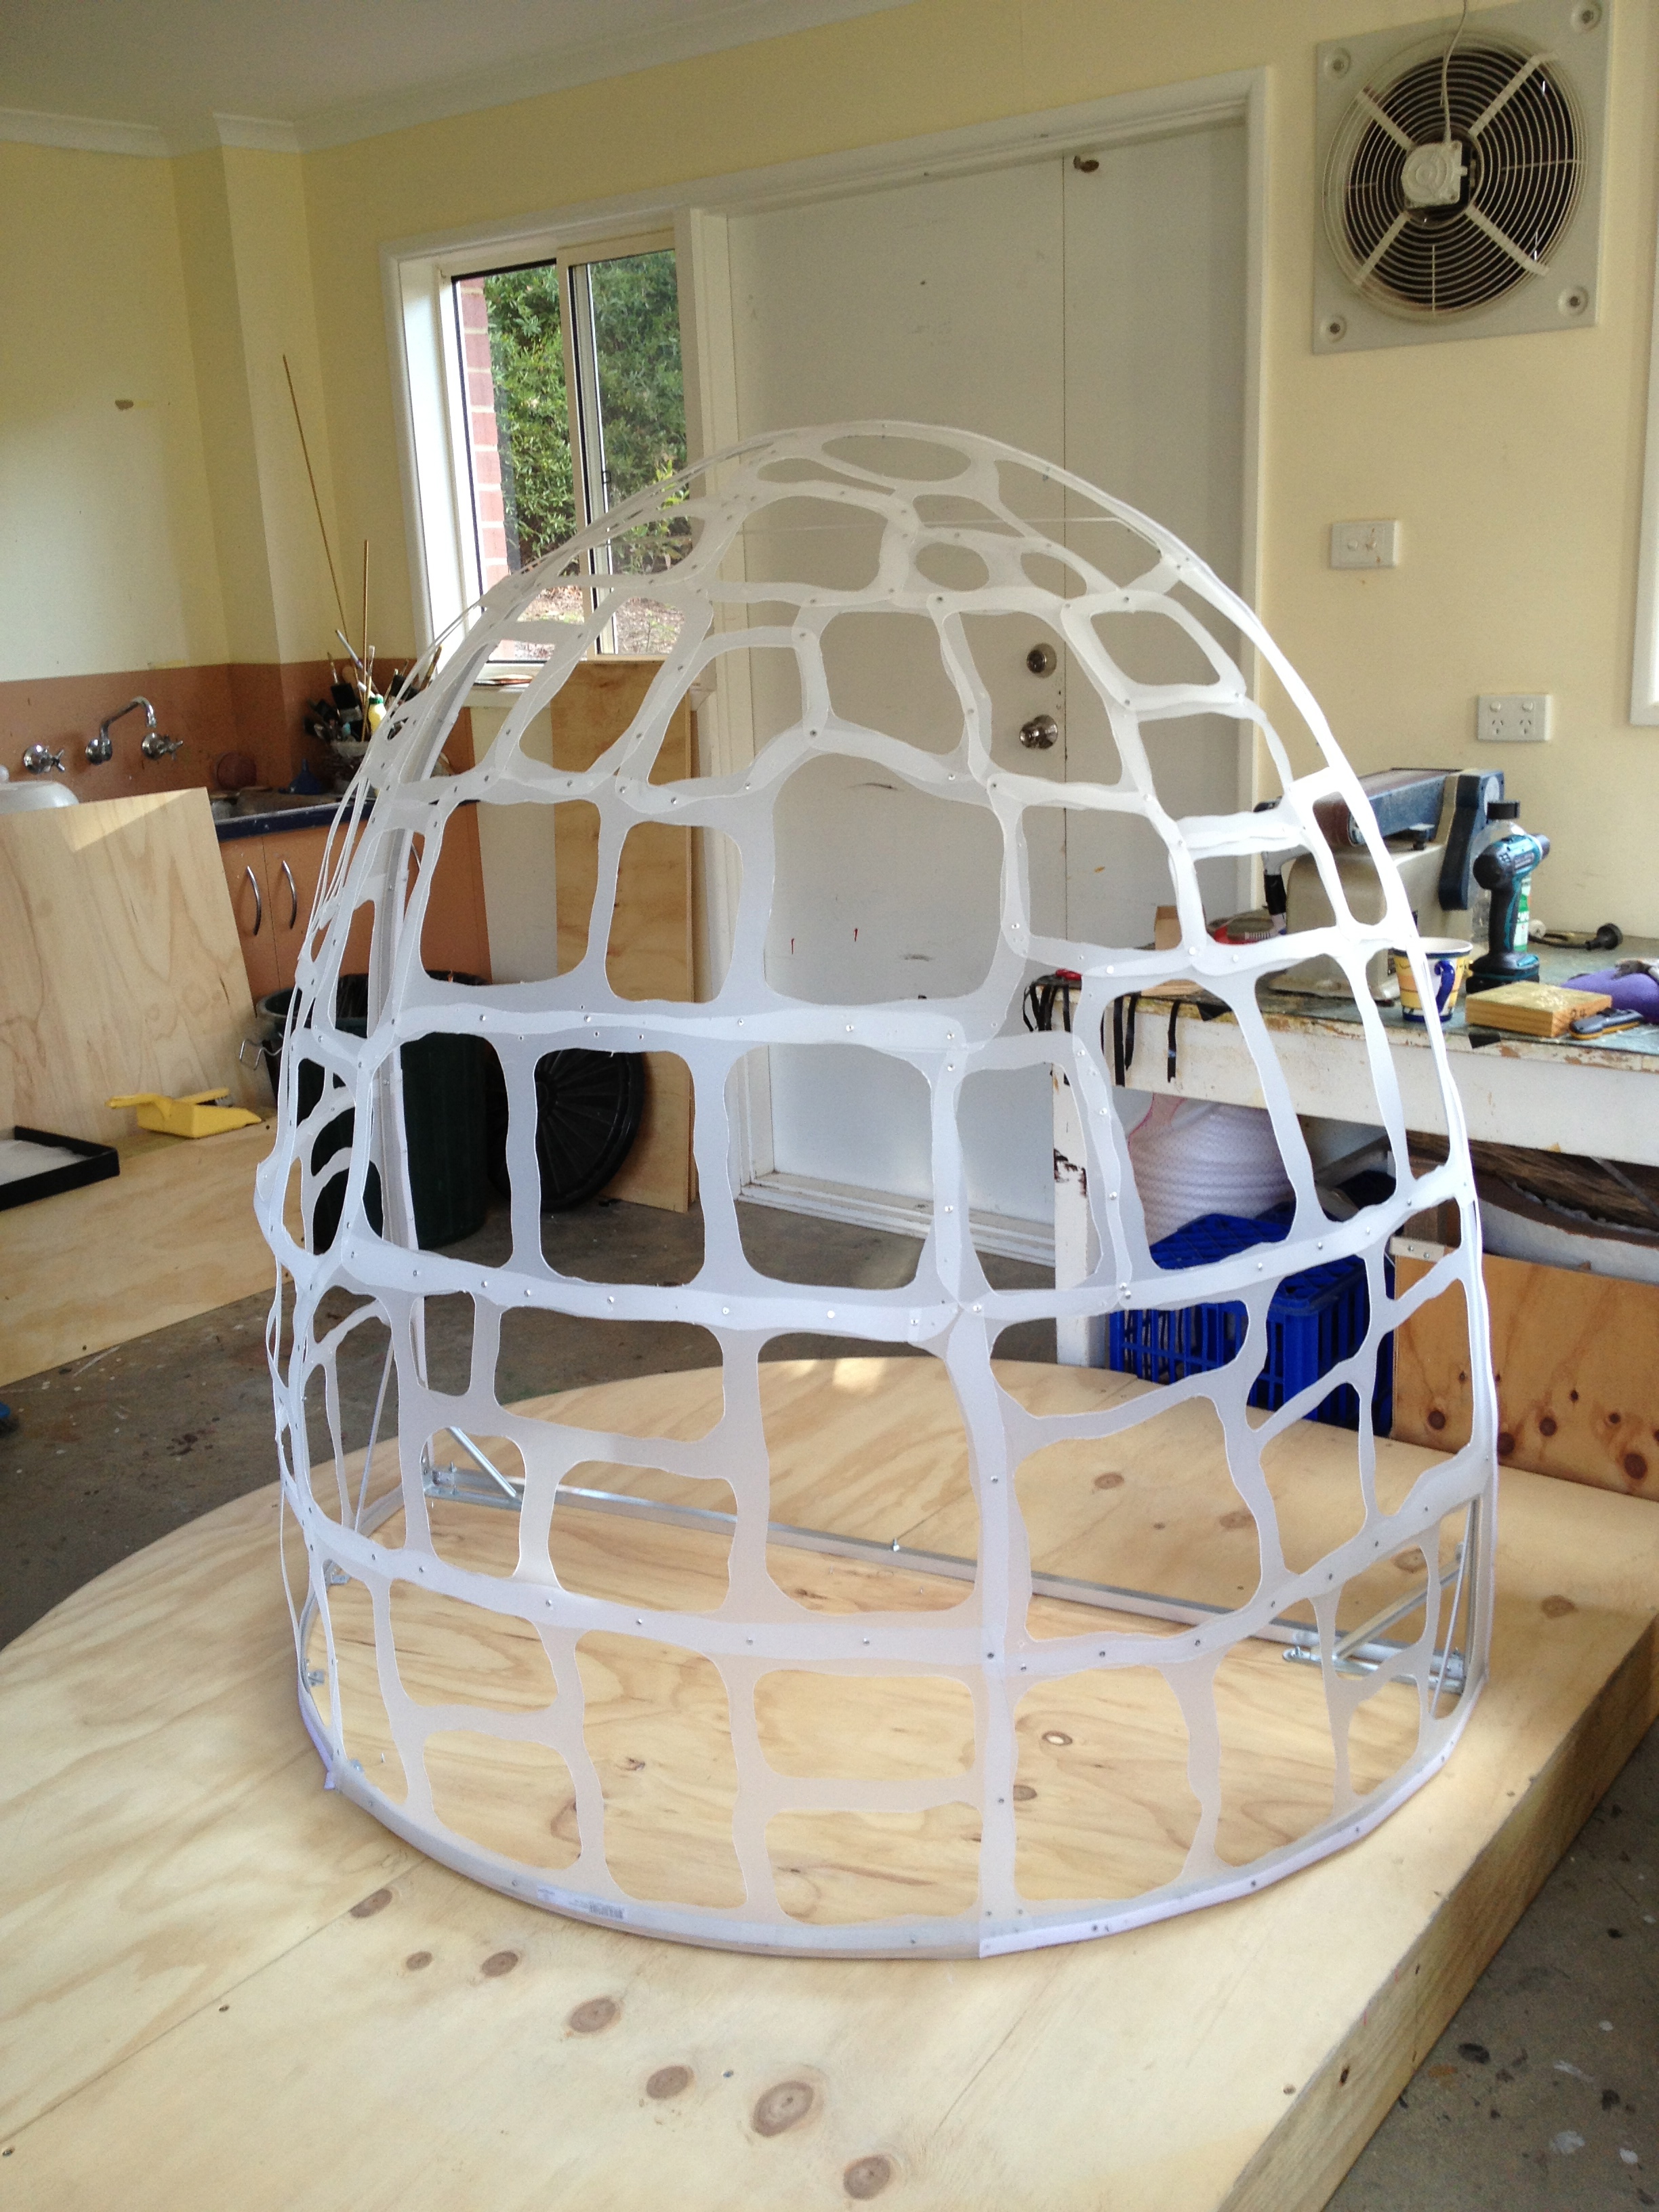
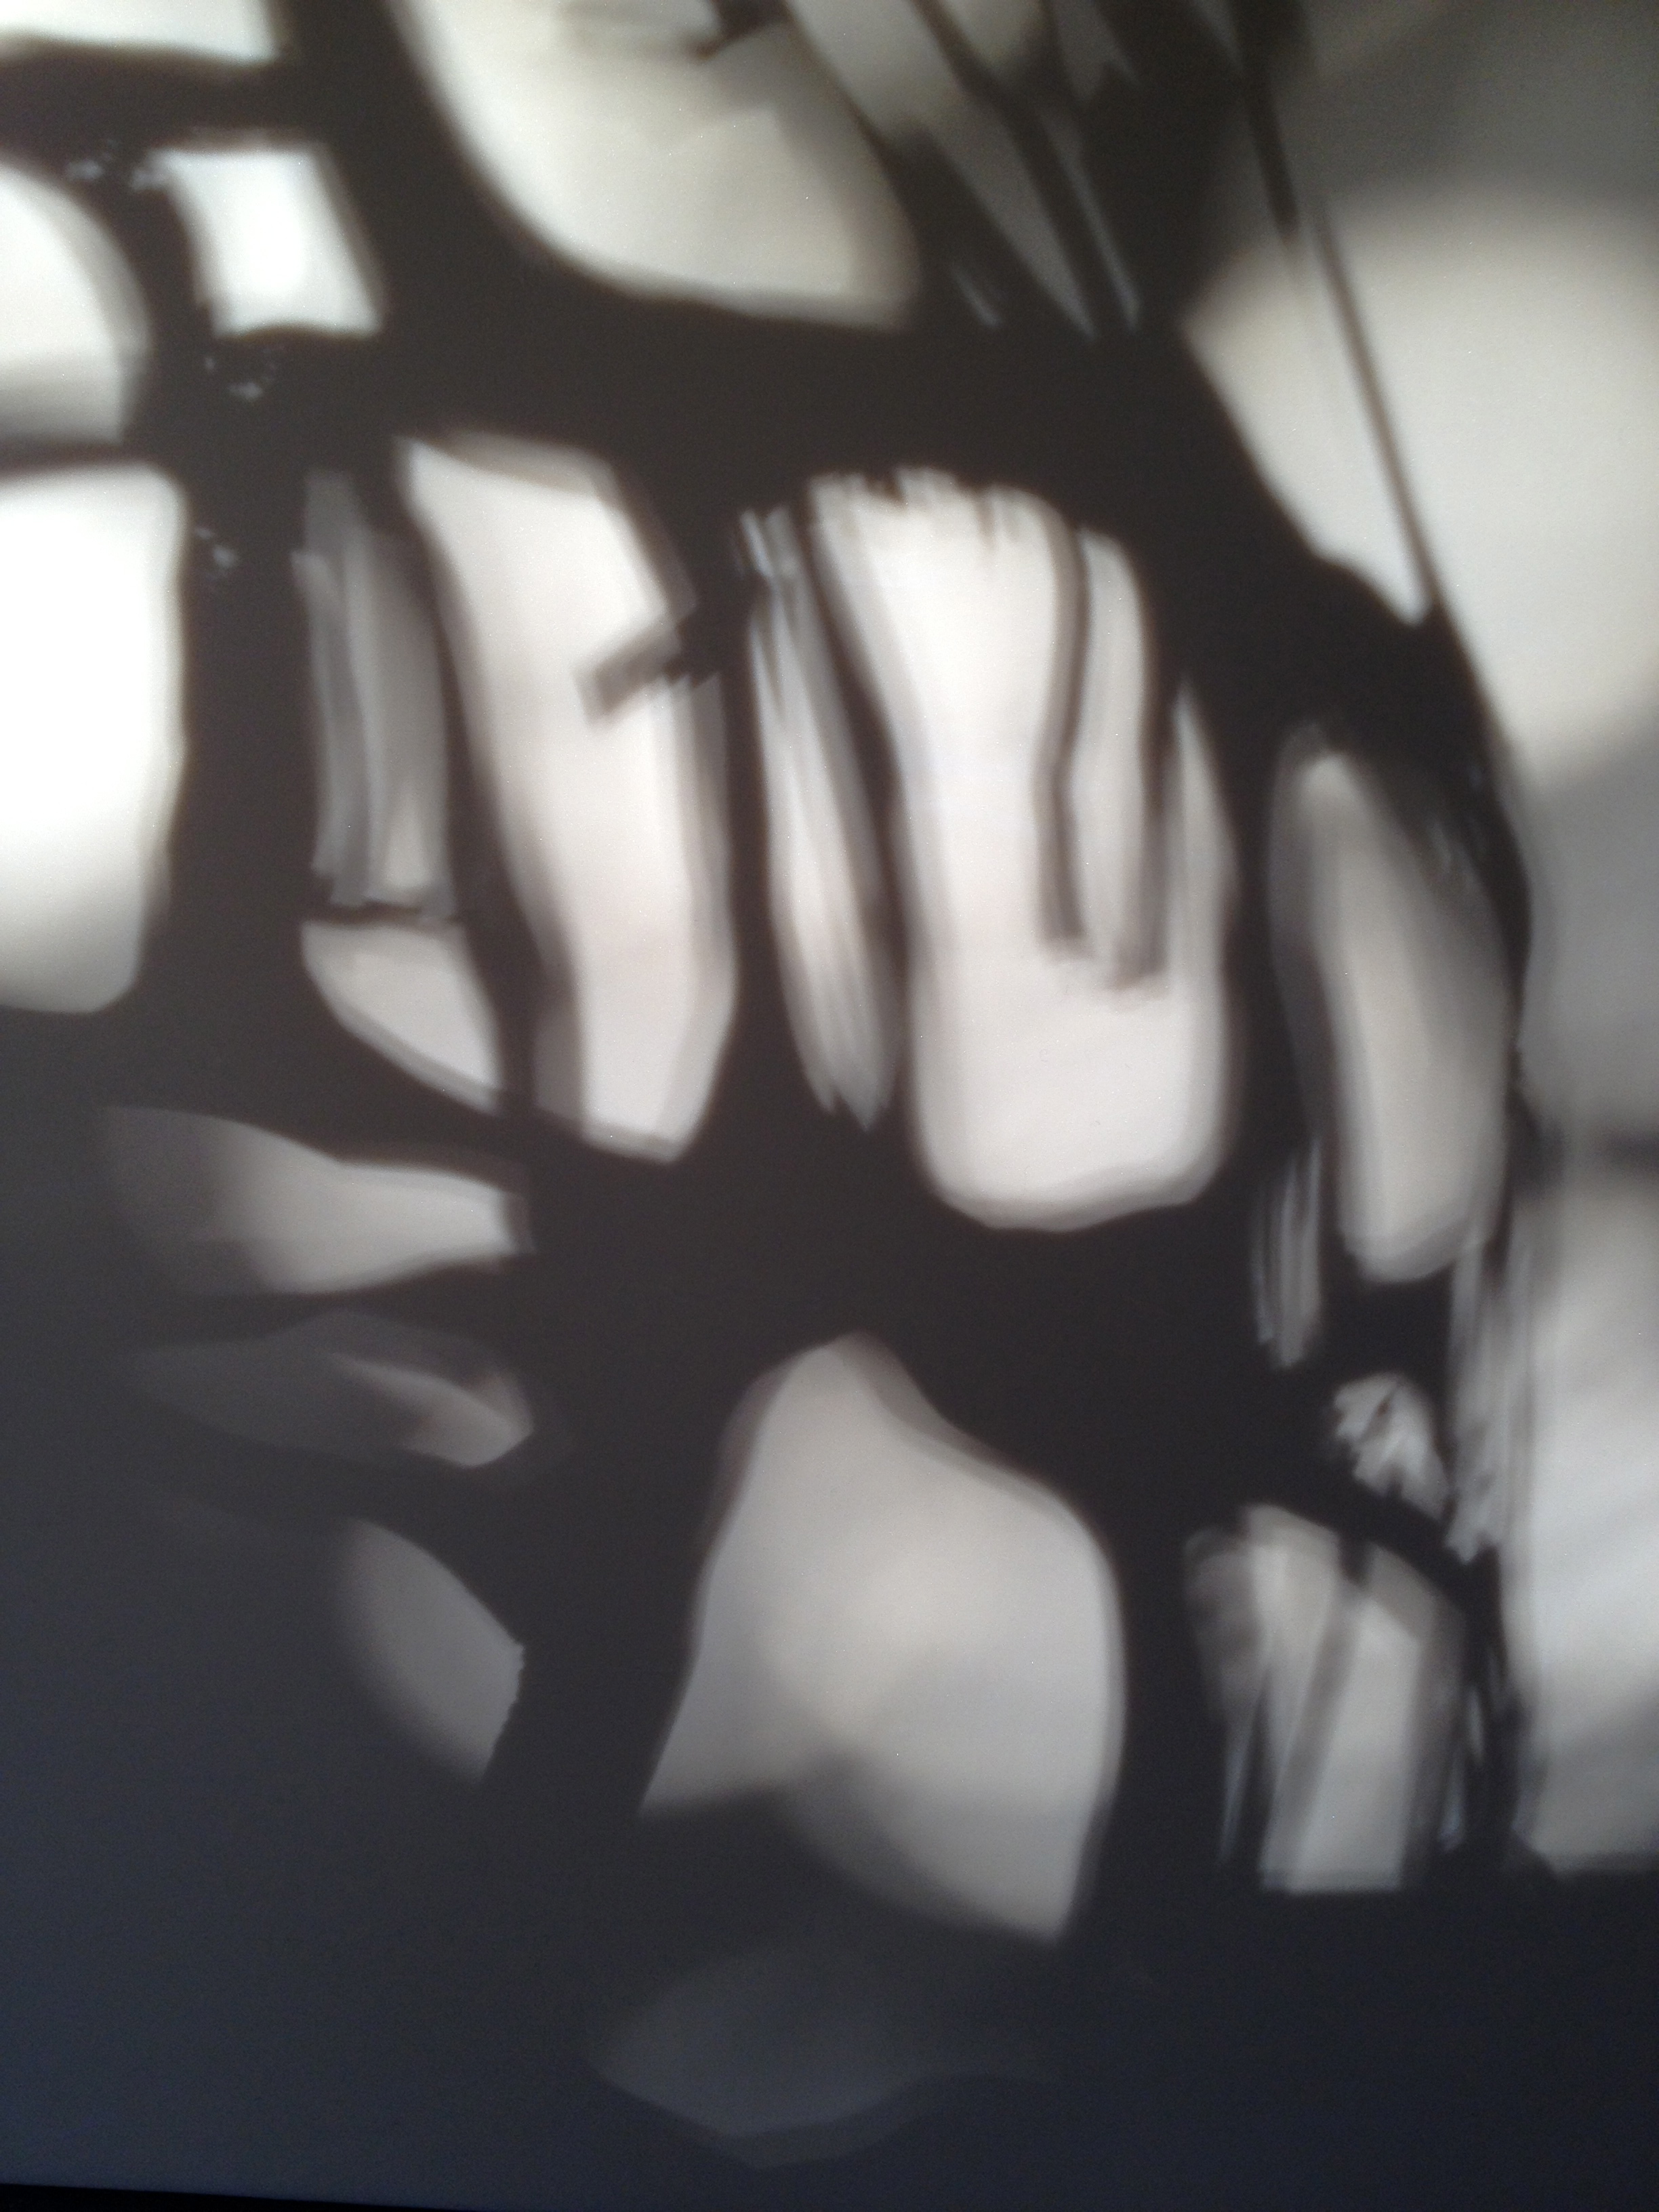
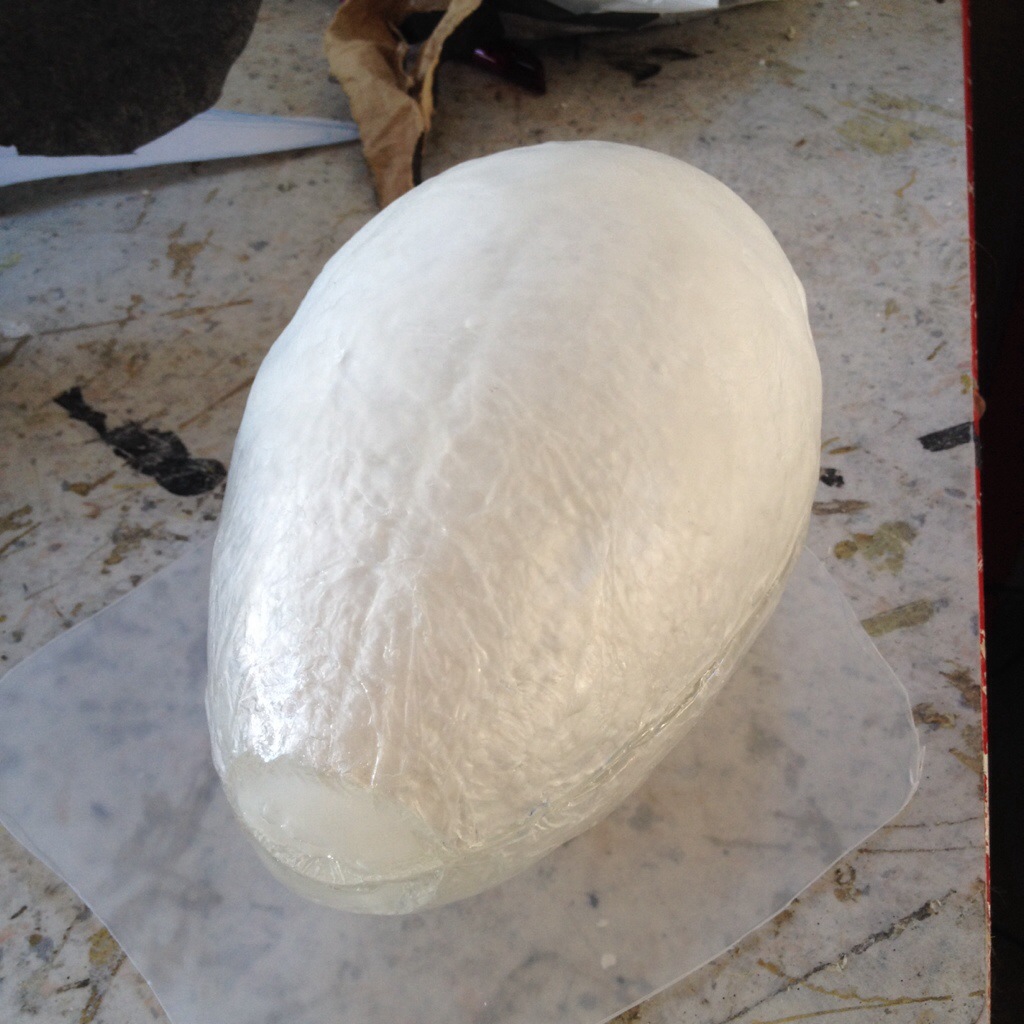
This photo shows the egg completely covered with plastic, in various stages of setting. The opaque areas of white at the large end are set, but in other places where it is still warm you can see right through to the gladwrapped polystyrene inside. Once the egg was covered roughly, I spent quite a bit of time heating it with a hairdryer and then smoothing it out. One of the great things about Plastimake is that it can be reheated and reused, as well as added to, drilled and cut.

20131013-204738.jpg

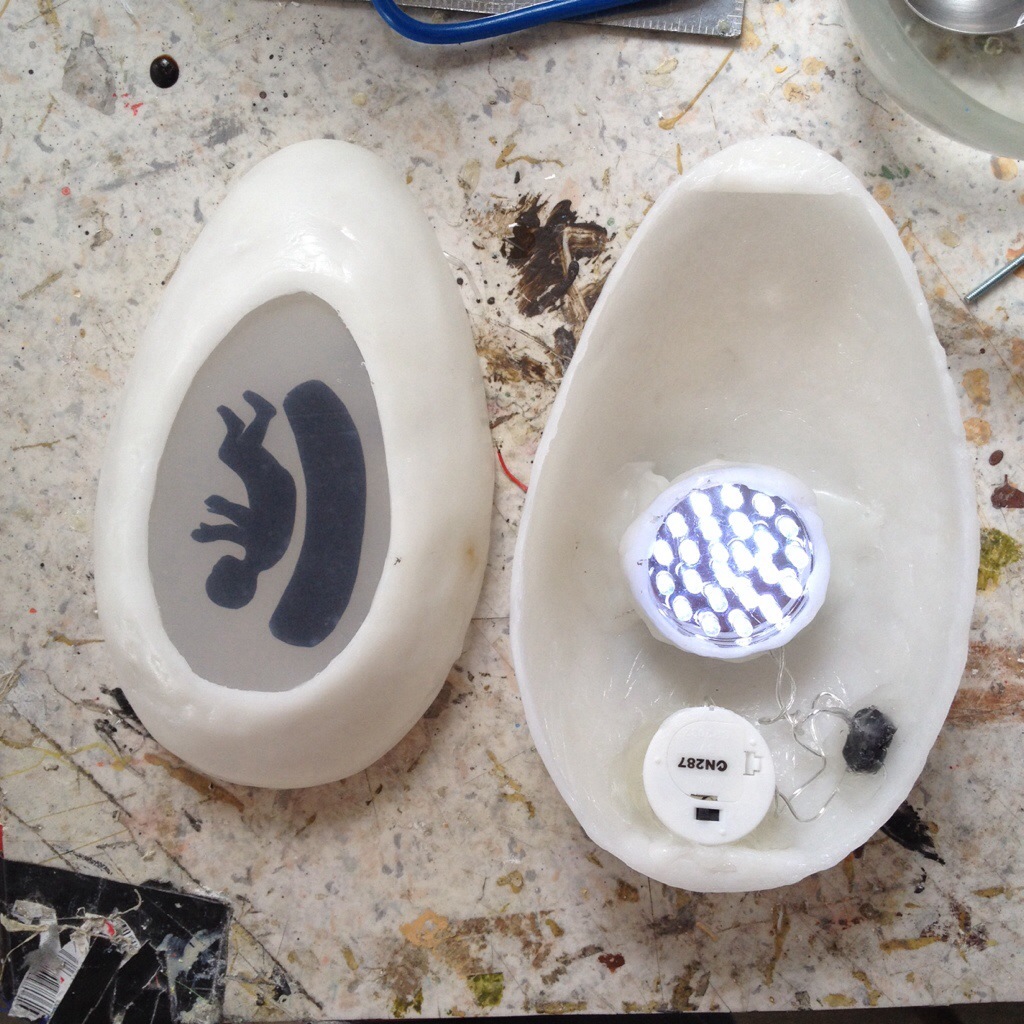
The egg has a flattened part for it to rest on so it doesn’t roll around, and into that I set some polypropylene sheeting with the black contact cut-out of the the baby in a coolamon. In the other half is an led light unit from the dollar shop, with it’s switch button rewired to fit into the right position poking through to the outside of the egg. I also replaced the batteries that came with the light with button batteries instead as it seemed neater, hacking a tealight battery holder so that it held two batteries rather than one. (Thanks Zaiga!)

20131013-204803.jpg

Once the egg itself was made and joined up I paper mached the outside with white tissue paper because although paint takes well to Plastimake it can rub off fairly easily with wear. The speckled finish is spray paint and a little green acrylic paint.

20131013-204831.jpg

Grey felt

20131011-223051.jpg

I couldn’t find any fur fabric that was right, so opted for felt for covering the kangaroo mask. I was actually happy about that, (although it still leaves the question of what fabric to use for a tail), because I loved the masks using this technique that I made some years ago. I built a section into the inside of the mask that will fit the wearer’s face comfortably and firmly. There’s still quite a bit of detailing to be done on the ears, eyes and mouth.

While the mask was drying I went back to  making an emu egg for the same show, Biami. I’d already made a polystyrene form for it, but had set it aside while I considered how to make it light up inside. Today I finally covered the egg in Plastimake. I’ll have some photos of the egg later as it progresses.

The Rock House

IMG_9521

This is the little ‘rock’ house I made for the play I blogged about last week, Joy McDonald’s The (Very) Sad Fish Lady. It is made from sheet polypropylene cut to suggest rocks , and was covered with gauze, so that it could appear solid when lit from outside, but could also show action inside when lit internally.

IMG_9862

Here are a few making photos.

IMG_9506

IMG_9508

IMG_9507

The puppets in Aardman’s new Pirates Movie


Aardman’s latest movie The Pirates! – In An Adventure With Scientists is released on 28 March, and looks like it will be lots of fun. Here are three videos that give a look at the stop motion puppets and the making process.

David Sztypuljak’s  video has some great footage of the sets, workshops and puppets. He also has an accompanying arcticle:


Andrew Bloxham talks about the complex process of creating the Pirate Captain’s luxurious beard:


And Caroline Hague, puppet and maintenance coordinator, talks about looking after the puppets.


Testing an elephant trunk


The elephants in yesterday’s post reminded me of this big elephant trunk I made for The Flying Fruit Fly production, The Promise, in 2008. It was meant to wave out from behind some set element, implying the whole elephant was just behind. The mechanism was based on a tentacle mechanism I had worked out previously, but was more complicated because the control lines were too long for the see-saw lever and instead required spools to wind the lines onto alternately to take up the slack. In turn there was a lot of tension exerted on the spools, and the trunk weight added to that problem. So, not a perfect solution, but an interesting make.


I also thought this was nifty – wrinkly elephant skin made by painting latex on stretched lycra! This idea was suggested to me by Tim Denton, from AboutFace Productions, who did the major build for the show, and it worked brilliantly.


So that’s what pith is!

Although I don’t generally like doing repairs (there are exceptions) it’s part of the business, and sometimes interesting to find out how something is made.

One of my clients asked me to mend a hat that he uses for some of his gigs. The brim is quite thick, and its shape was disintegrating. Much to our surprise there were lots of little chunks of wood inside! On the intact side the bits were glued together into a set shape, but elsewhere they were broken up and higgledy-piggledy. Today I poked around a bit more and ended up taking them all out. I’ll probably replace them with shaped foam.

The hat is from the Calcutta Sola Hat Agency, which was enough of a lead to work out on Google that this is a sholapith helmet, and the bits inside are actually pith! It’s the inside spongy core of a water plant which can be pressed and shaped into works of art. I hadn’t ever looked into why pith helmets had that name. It looks as if the hat makers pressed the pith into a newspaper-lined hat mold, and then sealed it off with a few more layers of paper, before covering it with cloth.

Officer Dan softie

The custom softie I was making last week was “Officer Dan”, the face of a new board game called Highway Patrol. He will be part of the game promotion when its inventors travel to the International Toy Trade Show in New York next week.

I’ll post a few more making photo’s in my photoset at Flickr in the next day or two.