how to

Nori Sawa’s masterclass

Day 1

I’ve made a set of photos and notes that I took during Nori Sawa’s masterclass that I did at Unima 2008. Nori Sawa is a Japanese puppeteer, designer and maker who now works and teaches at the Academy of Performing Arts in Prague, and he taught us how to make a Ningyo-Joruri head. This is much the same as a traditional bunraku puppet head, having a neat neck mechanism and trigger in the handle so that the head has a smooth up-and-down action, which together with a shoulder plate that sits loosely locked around the neck (we didn’t have time to make this), gives the character a very flexible head and neck movement.

There were six of us doing the class (from Canberra, Melbourne, Hobart, Adelaide, Sydney and Alice Springs – how’s that for a good national spread?) and it went over the first 3 1/2 days of the festival. For me it proved a good way of learning some new skills and settling into the festival and getting to make some new friends, including Naomi Guss, whose blog I have been reading for some time now. It was good to finally meet her in person, and spend some time with her.

Day 1 Day 4 Day 4 Day 4 Day 4 Day 4

(Naomi and Nori, Kristen, Jill, Kathy, Frances and Vanessa (one of the organisers) – click to enlarge)

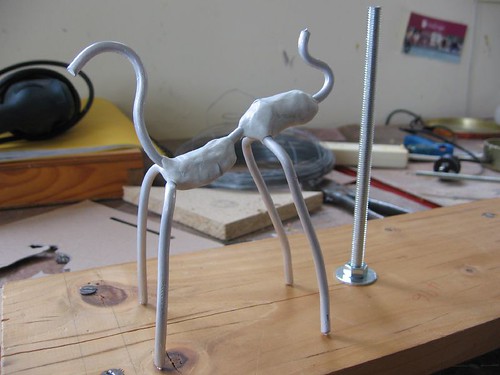
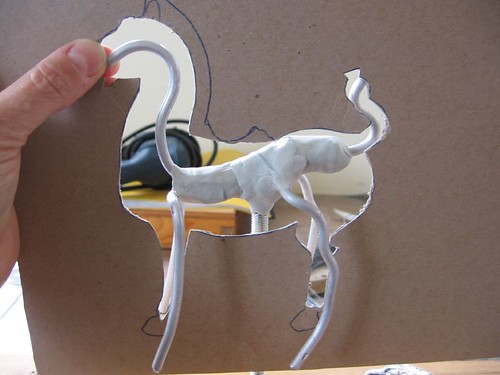
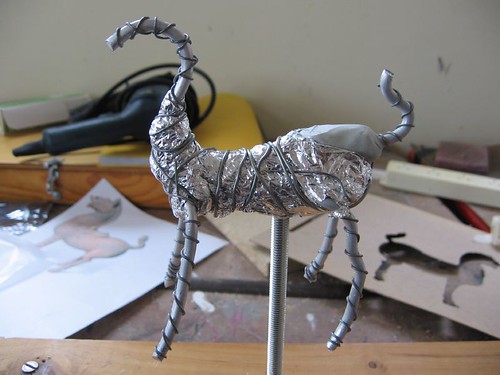
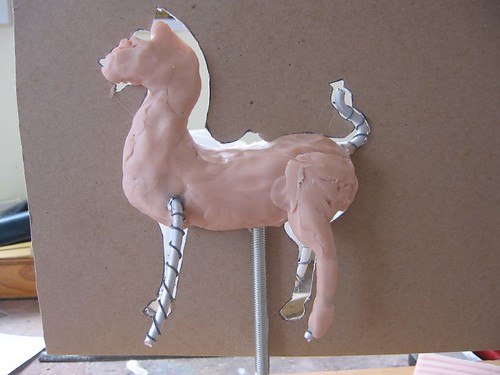
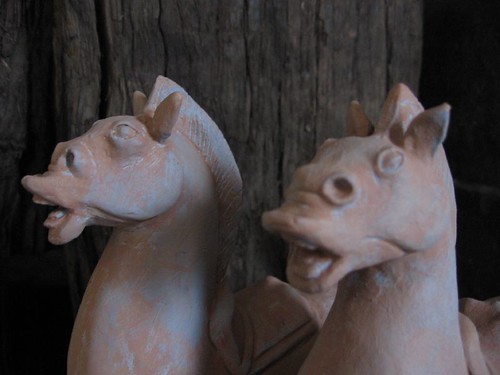
The making process involved sculpting a clay head; making a plaster mold; creating a hollow paper mache head by paper mache-ing inside the two halves of the mold and joining the resulting paper shells; shaping and joining the wood to make a handle, trigger and neck; stringing the trigger mechanism; and finally situating and attaching the neck into the head with an axle and elastic for return on the trigger. A lot to achieve in the time – we had a battle to get each stage dry and used hairdryers borrowed from our hotels, a microwave, the sun, and eventually a pie warmer to get there! I loved the moment when we sealed the two halves of the head together with white glue and a small red hot iron – it still seems magical to me that that works so well!

This is my puppet head in action. The clip is a little clumsy, since I was filming and operating, but it gives the idea. I haven’t decided what kind of finish to give it yet. I will at least paint the eyes.

Some aspects I don’t want to forget: The tradition in these puppets is for the chin to be prominent, and the focus of the puppeteer is on the chin, it leads the action. The eyes have a flat surface that is angled down; when the face lifts up you see the whole eye this way, and it lightens the whole character and mood. The action of the puppet and each movement it makes is that of a circle or infinity; this kind of choreography gives grace and life.

Sadly we didn’t get to see Nori perform because on the way to Australia his bag of puppets became one of the 16,ooo items lost at the choas of the shambles that is the new Heathrow Terminal 5. I’d love one day to see some of his contemporary puppets and shows that fuse Japanese and Czech design.

actgov.jpg

My attendence at Unima 2008 is supported by the ACT Government

Updating

Over Easter I finally got to do some updating of my whole site. There is still some fiddling around the edges to do, but I’m happy that my work portfolio is now up to date and will be easier to manage in future, and that all the old bad links have been stripped out of the other static pages.

I did somehow stuff up my Monkey See Monkey Do blog, and had to start up a new installation of WP for it, so I guess I’ve lost what little google juice it had. So if you are searching for things like how to slice a banana inside its skin, make tea towel chooks and jumping handkerchief mice, or whistle through your hands, it’s here, or you can use the nifty new navigation tabs at the top of the page.

All the wild little horses

Horse sculptures

I loved making these two little horses recently for an up-coming theatre production, Emma’s Dynasty, by Jigsaw Theatre Company. They are based on an earthenware Chinese Han Dynasty horse that is here in the Australian National Gallery collection, but they are tiny in comparison, only 17 cm high at the head. I really like how stocky and wild the horse is, and how he looks like he has come to a screaming halt.

Horse

A while ago Andrew at PuppetVision linked to a super sculpey sculpting tutorial by Peter Konig, and it was really useful to me while I was doing the horses – thanks to you both! The tutorial is much more detailed than what I am going to write here – no sense repeating – and I can really recommend it.

The first steps were to make an armature using armature wire. In this case the strength the armature gives the legs and tail is particularly important. From the nose to the tail is one wire, and then the legs are separate wires, wired on with fine wire (Peter has close-ups on how to attach them), and set in place with Knead-It, a Selley’s two-part epoxy. You knead the parts together, and it sets as hard as a rock in five minutes – invaluable stuff!

Horse sculpture

I also used wire and Knead-It to attach the armature to a firm stand. I struggle with being too impatient at the beginning of a project to go to the trouble of making a firm base like this, and I often regret it – and know I’m going to regret it, what’s more! However, I’m getting wiser about this, and decided to follow Peter’s advice, even though the horse was small.

Horse sculpture

Another tip that I appreciated was to make a cardboard cutout of the silhouette of the horse to use as a reference while sculpting. I usually sculpt by eye, but this allows you to check how you are going.

Horse sculpture

I padded out some of the bulkier parts of the body with aluminium foil, as a way of saving how much super sculpey I needed to use later. Wire is wound around the armature wires to give something for the modeling clay to grip onto.

Horse sculpture

Now the best bit, the modeling! I’ve only recently started using Super Sculpey, and its a real pleasure to work with, because it remains soft for a long time and takes detail so well. Peter says to check it’s soft when you buy it, in case its been on the shelf a long time, and to keep it in a zip lock plastic bag.

Horse sculpture

So she kneaded it and punched it and pounded and pulled till it looked okay… You can use mineral turpentine to gently bush the surface detail to smooth it, and almost model the tiny detail with the brush.

Horse sculpture

Into the oven to bake. I had trouble fitting it in my oven still attached to the stand, and ended up putting it in on its side. I thought trying to cut off the support before the horse was baked might risk the horse getting squashed. Maybe next time I should make it so it unscrews instead.

Horse sculpture

Sawing the support bolt off was a little tricky, but manageable. There were a few small cracks, but I gather this is quite common, and took Peter’s advice to fill them with sculpey and blast it for a few seconds with a heat gun, only in my case it was with a hair dryer. Instant glue is effective for mending breaks. Then, on to the second horse.

Horse sculpture

Super sculpey takes acrylic paint very well, and I used a dappled mix of greys and terracottas to get the final finish.

Horse sculptures

There are more photos here. I guess I got a bit carried away, but sometimes that just happens.

Horse sculptures

Flying ducks

I’m working on several projects at once at the moment. One is making a set of those flying ducks that people had as wall ornaments when I was growing up. I’ve been lent a couple to model from, and looking at them up close I can understand their attraction, despite their kitsch reputation. Since the ones I am making are theatre props they only have to look like the real thing. Inside, they have an mdf structure, and I have bulked them out with polystyrene. I like carving styrene, except for the mess.

Flying ducks

The next part of the process is covering the shapes with a commercial paper mache pulp. It starts as a dry mix, and when you add it to water it turns into a thick paste, which can be smoothed on and sticks to most surfaces. Here I’m half way through adding the paper mache to the big duck:

Flying ducks

The pulp takes a couple of days to dry, but I’m always impatient with things like this, and I have been hurrying it along by putting the ducks in the sun,

Flying ducks

and the oven:

Ducks in the oven

I’ll have to add more detail to the shapes, like the eyes, tails and feather patterns, and then its a matter of getting the surface smooth and painting it to look like china.

We have four beautiful white pet Indian Runner ducks, and it was funny to see them charging across the back garden in a line just as I was photograhing these in the kitchen.

Gimme a head with hair…

It’s nice to have Claire posting again at Loobylu. (Claire had a beautiful second baby girl recently – congratulations!). Her post today mentions the difficulties of making hair on dolls – I agree it is tricky, and depite the post title, I really don’t like dealing with hair at all! It jogged me to scan some drawings that I have found useful for hair making. They are from an old book we have called TOYS you can make yourself, published by Odhams Press Ltd, London, advisory editor Hilary Page. Other than that it has no copyright information, but I’d guess it’s from the late 40’s or 50’s.

In this first figure, the middle row of stitching is the parting of hair down the centre of the head. You make it as long as is needed to cover the head, and then draw back the hair into bunches or plaits or however you fancy and stitch them on.

Hair

I used this idea for the doll I made a while ago, but instead used an interesting kind of fabric. I always forget its name, but its something like ‘feathered velour’. I stitched it slightly gathered down the centre of the head, and then arranged it to look like strands of hair in bunches, and cut the ends to give it that effect, too. On a doll that size it was a lot easier and quicker than doing the wool
thing.

The next one shows making loops of hair. I guess you could cut the ends once the loops are sewn on.

Hair2

This one for gollywog hair is the one I have used most, not so much the circling attachment to the head which gives you the shock-headed hair, but the making of the hair by stitching it on doubled-over paper. It’s a bit like a flat pom-pom! Instead of circling, you can use it for rows around the side and back of the doll’s head, and for fringes.

Hair3

Simple rods puppets from recycled materials

RodThese are two simple rod puppets which were made by my son when he was about 8, at a workshop that I was involved with.

The materials were recycled bits and pieces. The basic pattern was a plastic bottle for a body; a stuffed sock for the head; cardboard tubes running through the bottle neck for the neck, and for holding the puppet from below; strips of foam for the arms; wire rods for manipulating arms and hands; and odds and ends of fabric and other things (glitter, eyes, bobbles, straws, paper, offcuts of leather, ribbons and cord, and so on) for features and decoration.

The main preparation for the workshop, apart from collecting all the materials, was making the rods, though they were simple enough. They were a strong wire (it must not bend too readily), cut to size, straightened, anchored in a length of dowel at one end, and bent or hooked (so that could be poked into the foam at the wrist) at the other end. To fix the wire in the dowel, drill a hole down the centre of the dowel that the wire will fit in tightly, and then make a tiny bend in the wire a centimetre or so from the end before pushing it it. For this purpose the bend is enough of a barb to keep the wire in.

Craft glue was used to attach fabrics and foam, but we had a nifty way (I still think it’s nifty!) for the kids to attach the arms to the body: cut a X about 3 cm across into the plastic and just push the foam through. Again, the tension and points of plastic are enough to secure the foam. The elbows and wrists are made just with string tied tightly around the foam, but they are surprisingly effective.

I think the most important aspect when doing this kind of workshop (after providing basic ideas, materials, and help) is to leave the rest to the imagination of the makers, so that other ideas in construction, features, characters and the stories that inevitably emerge with them, are welcome and valued.

Simple rod puppets

A tentacle mechanism

When I was making puppets for ‘The Lost Thing’ a few months ago we had to come up with a simply-made tentacle that could start out straight, and then reach about a metre or more, and curl around to some extent at the tip. Here is the drawing I made of the mechanism I invented, in case its useful to other makers:

Tentacle
(click to enlarge)
The tentacle shape is made of a very soft foam, and has two tracks of heavy duty fishing line running up each side, though small sections of plastic tubing. The kind of tubing I found good was antenna housing that model-car hobbyists use, because it is strong and rigid.When the fishing line is pulled the tentacle curls, and when it is released the foam itself acts as a kind of spring, returning the tentacle to an at-rest straight position. I did have to put some additional spring and rigidity in the core of the foam, though. It was an experimental mixture of different lengths of spring wire, boning and strip plastic, with the idea being to incrementally decrease the rigidity towards the tip. You have to balance aspects like having the foam soft enough to compress easily, and the core springy enough to return but not too rigid to bend easily, and so on.The tentacle was covered: a very thin layer of dacron batting to make it all smooth, and then lycra.

The curls in simple tentacles usually only work in two directions. They are mechanically similar to those intriguing flexible wooden snakes and fish whose bodies are sliced into lots of cross-sections, and then constructed again with a leather or canvass strip running up the middle of the body:

Snakecurl
A tentacle made like this moves from side to side, not up and down, or with any twisting. The thing that excited me about the foam tentacle was that by pulling on both lines with varying pressures, it would twist around in a very sinuous way. It was not a feature that could be used much in the play, as the puppeteer only had one hand free to operate the tentacle, but it was an interesting discovery. It would also be worth experimenting with trying three or four operating strings, if the base of the tentacle was in a firm housing rather than being hand-held.