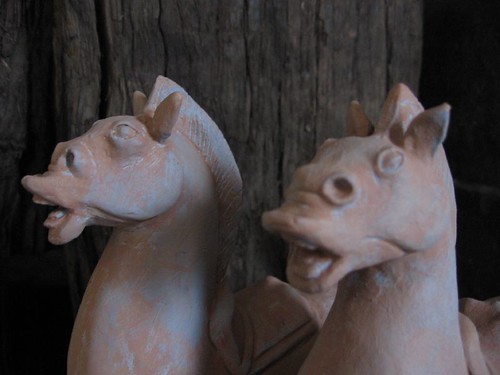
I loved making these two little horses recently for an up-coming theatre production, Emma’s Dynasty, by Jigsaw Theatre Company. They are based on an earthenware Chinese Han Dynasty horse that is here in the Australian National Gallery collection, but they are tiny in comparison, only 17 cm high at the head. I really like how stocky and wild the horse is, and how he looks like he has come to a screaming halt.
A while ago Andrew at PuppetVision linked to a super sculpey sculpting tutorial by Peter Konig, and it was really useful to me while I was doing the horses – thanks to you both! The tutorial is much more detailed than what I am going to write here – no sense repeating – and I can really recommend it.
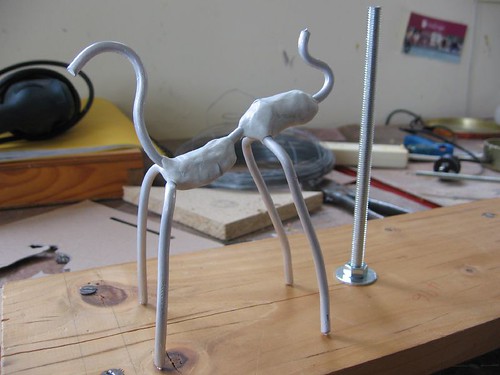
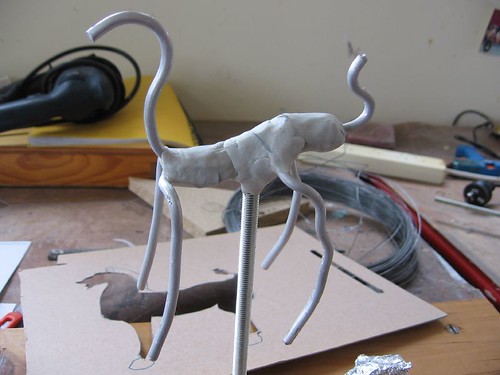
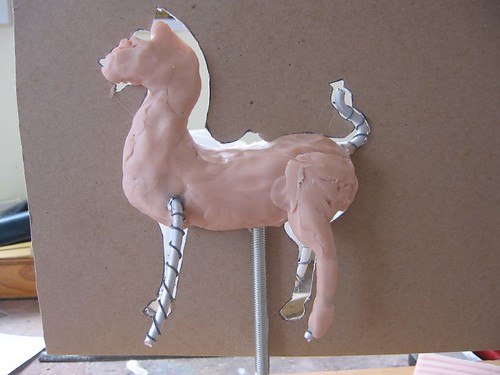
The first steps were to make an armature using armature wire. In this case the strength the armature gives the legs and tail is particularly important. From the nose to the tail is one wire, and then the legs are separate wires, wired on with fine wire (Peter has close-ups on how to attach them), and set in place with Knead-It, a Selley’s two-part epoxy. You knead the parts together, and it sets as hard as a rock in five minutes – invaluable stuff!
I also used wire and Knead-It to attach the armature to a firm stand. I struggle with being too impatient at the beginning of a project to go to the trouble of making a firm base like this, and I often regret it – and know I’m going to regret it, what’s more! However, I’m getting wiser about this, and decided to follow Peter’s advice, even though the horse was small.
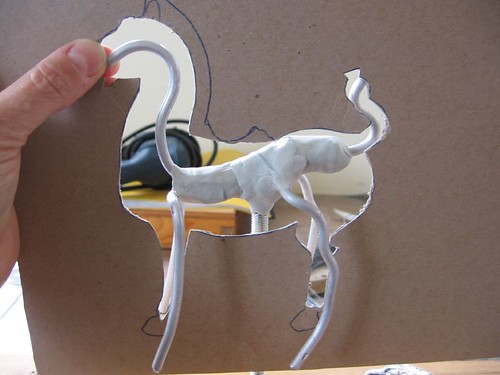
Another tip that I appreciated was to make a cardboard cutout of the silhouette of the horse to use as a reference while sculpting. I usually sculpt by eye, but this allows you to check how you are going.
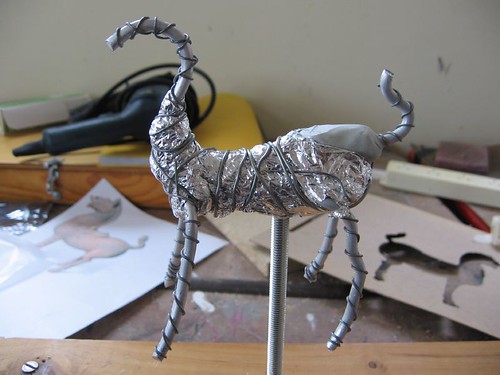
I padded out some of the bulkier parts of the body with aluminium foil, as a way of saving how much super sculpey I needed to use later. Wire is wound around the armature wires to give something for the modeling clay to grip onto.
Now the best bit, the modeling! I’ve only recently started using Super Sculpey, and its a real pleasure to work with, because it remains soft for a long time and takes detail so well. Peter says to check it’s soft when you buy it, in case its been on the shelf a long time, and to keep it in a zip lock plastic bag.
So she kneaded it and punched it and pounded and pulled till it looked okay… You can use mineral turpentine to gently bush the surface detail to smooth it, and almost model the tiny detail with the brush.
Into the oven to bake. I had trouble fitting it in my oven still attached to the stand, and ended up putting it in on its side. I thought trying to cut off the support before the horse was baked might risk the horse getting squashed. Maybe next time I should make it so it unscrews instead.
Sawing the support bolt off was a little tricky, but manageable. There were a few small cracks, but I gather this is quite common, and took Peter’s advice to fill them with sculpey and blast it for a few seconds with a heat gun, only in my case it was with a hair dryer. Instant glue is effective for mending breaks. Then, on to the second horse.
Super sculpey takes acrylic paint very well, and I used a dappled mix of greys and terracottas to get the final finish.
There are more photos here. I guess I got a bit carried away, but sometimes that just happens.


