theatre

Flotsam and Jetsam

lighthouse island set

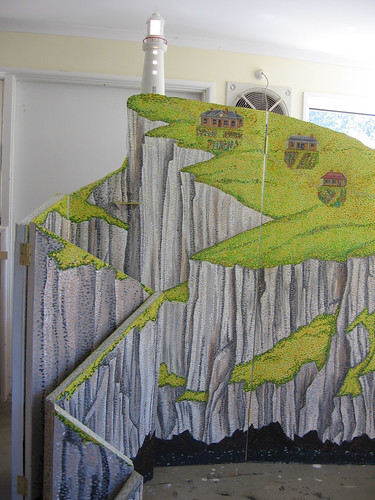
Earlier this year I made the set and props for Flotsam and Jetsam, a production for children which tells stories about living on Australian lighthouse islands in the past. The script was written by Greg Lissaman, from recollections gathered by Chrissie Shaw, the actor. Catherine Roach is the director.

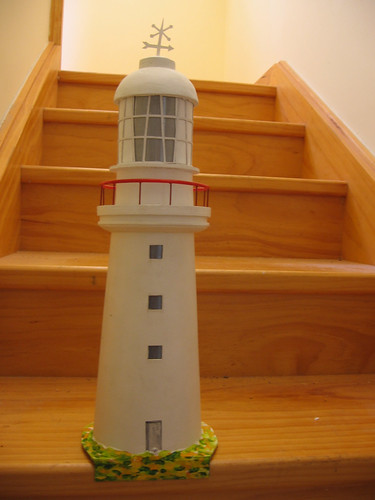
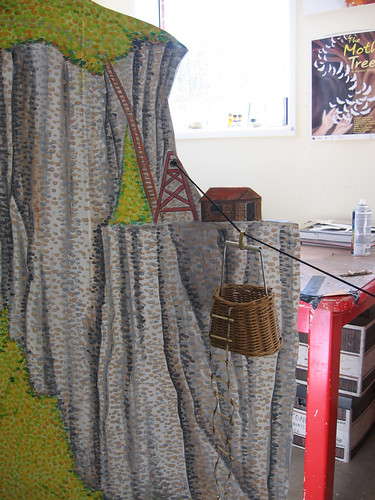
The set is an island, panels painted in a pointalist style, which can concertina into different shapes and be dismantle for touring. The lighthouse is modelled on the historic lighthouse at Cape Otway in Victoria, and Tasman Island in Tasmania was among other sources of stories and images, such as the flying fox access to the island. There were numerous props – seaweed, wooden chests, a porcelain doll, an albatross, and a sea buoy. There are more photos of these in my  Flotsam and Jetsam photoset.

Touring dates and booking details for Flotsam and Jetsam are listed at Chrissie’s site. On 19 – 21 August it has a short season at the Maritime Museum in Sydney, and then it will tour coastal community venues in NSW. Chrissie also performs The Keeper, an adult play also based on lighthouse stories.

lighthouse

flying fox
seagull skeleton
porcelain doll

Desirée, my dear dead manta ray

Manta ray

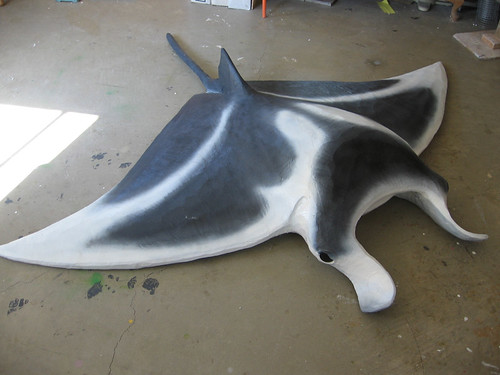
This is the big dead manta ray prop that I made for the Street Theatre’s production of Jacques Brel is alive and well and living in Paris.  Sadly Desirée – my name for her  – was cut from the final production, but I loved making her.  Manta rays are such awesome creatures!

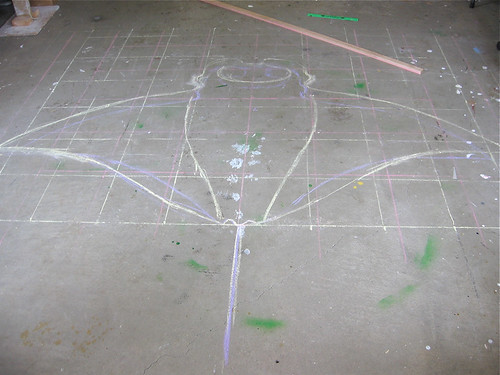
Because she had a wingspan of over 2 metres, I decided chalk on the floor was a good way to start drawing up a pattern. I also bought myself a little plastic model of a manta to refer to, which turned out to be useful.

Manta ray

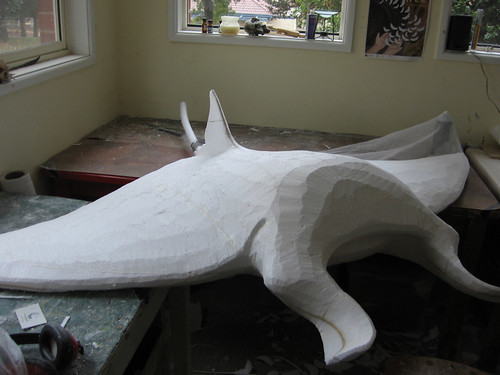
From this I traced a pattern onto butcher’s paper and from there onto sheets of polystyrene which were then built up and glued into a block.

Manta ray

I also decided to insert a strip of thin plywood into the underside right across the width of the wingspan, so that the wings would be protected from breaking, especially at the tips. I also did that with the fins that I added.

Then much shaping with a really sharp knife, a narrow power belt  sander, and sandpaper. I decided to keep the surface a bit rough, which often makes it easier for an audience to read.

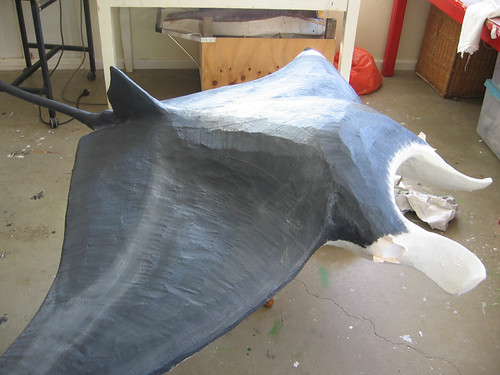
When I use polystyrene that will just have a painted finish I skin it with muslin first. Here you can just see some of the muslin draped over the spray adhesive can on the right.

Manta ray

I usually add a little bit of latex to the first coat of paint to help make everything stick to the styrene.

Manta ray

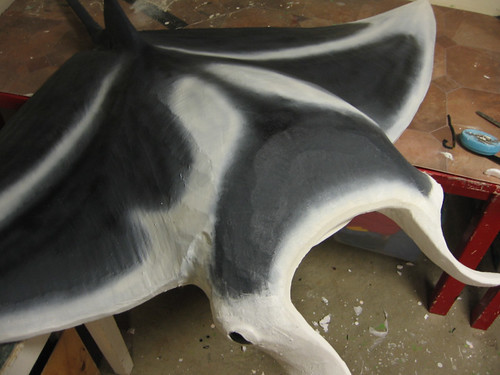
Then it’s on to colouring; for the final shading I used spray paint so that the colours merged softly. It was tricky to seat in the eyes (painted and glossed wooden door knobs) and get the shape of the upper eyelid right.

Manta ray

There are a few more in-between photos in my photoset at Flickr.

Disfarmer

Mimi mentioned seeing Dan Hurlin‘s tabletop puppet show Disfarmer when she was in NYC recently.  It’s described as

a puppet theater inspired by the life of American portrait photographer Mike Disfarmer (1884-1959). Something of a small town “Boo Radley,” Disfarmer operated a photography studio in Heber Springs, Arkansas, where for years locals and tourists lined up to have their picture made.

In the press kit one gets more of an idea of how Hurlin has interpreted the character, and why he chose the medium of puppetry: because both the photos and puppets are ‘inanimate objects whose inner lives are supplied by the insistence of the audiences imagination’.

I love the detailed movement and expressions in the behind-the-scenes video above, and the way in which you very naturally accept the puppeteer’s hands as the puppet’s at times. And the way the things like the clock just appear when they are needed.

Update:

Here is a cool work-in-progress excerpt which allows you to see the puppet’s construction, to a degree:

Kevin Rudd glasses

Kevin Rudd glasses

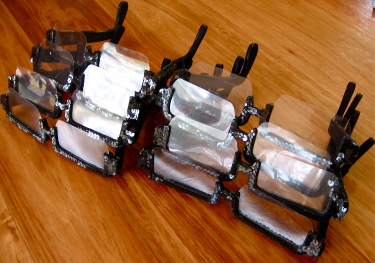
Eight pairs of sparkly Elton-John-sized Kevin Rudd glasses made for Shortis and Simpson’s lastest political satire, Three Nights at the Bleeding Heart, currently at the Street Theatre.

Handspring’s Woyzeck on the Highveld

Puppet from Woyzeck on the Highveld

On the last day of Unima 2008 Gary introduced me to his friends Adrian Kohler and Basil Jones, who co-founded and continue to run Handspring Puppet Company, and I was lucky enough to go backstage to see the puppets from Woyzeck on the Highveld. Thank you all!

The play itself had been a festival highlight for me. First staged 16 years ago, it tells the story of Woyzeck, a man of sensibility and principle, who is brought down by jealousy; but his struggle is informed in every way by the hardships of the migrant labour system under apartheid in the South Africa of the 1950’s.

Two aspects of the show intrigued me in particular.
One was the power of director William Kentridge’s back-projected animations which formed part of the backdrop to the set. They provided not only physical settings to the action and shadow puppets, but at times gave excruciating visual metaphors for what characters were thinking and feeling. For instance, in one scene, Woyzeck is worrying about setting his master’s table. He is doing fine in reality, but in contrast, as he gets increasingly anxious about doing it perfectly, the animation shows great smudges and spills amassing into a chaos that ends in, among other things, a plane crashing and burning.

The other was, of course, the puppets. They are bunraku-style puppets, with beautifully expressive carved (and hollowed out) wooden heads and hands. Adrian is the master puppet maker and designer. He explained how after touring Woyzeck extensively for some years, the company saw selling the puppets as the only way to move on to doing new work. Their latest production, Warhorse, would have been too big to tour, and fortunately, to their surprise, the Munich City Museum was happy to lend the puppets back for the gig at Unima 2008.

Margaret (?), Andries, with the accordion, and Maria with her baby:

Puppet from Woyzeck on the Highveld

The Miner:

Puppet from Woyzeck on the Highveld

The mysterious newspaper death-like character:

Puppet from Woyzeck on the Highveld

Adrian Kohler with the Miner, explaining how the implements in his hand can be changed:

Puppet from Woyzeck on the Highveld

The rhino, showing the rods and mechs on the operator’s side. There is a universal joint in it’s sternum. The red bulb is it’s bladder! (not to be confused with the 2 red chairs in the background).

Puppet from Woyzeck on the Highveld

Here is a video of the rhino in action. You can hear Gary and Adrian chatting.

I loved the rhino most, because it has so much character, and moves in such a life-like way, while being impressionistic in style. I’m very interested in this. Kohler has developed the style much further, too, since building the rhino, as you can see if you look at the horses in Warhorse. Warhorse is the first production where Handspring has moved away from performing their own work, and Adrian commented there were advantages in being solely a maker at times, rather than being a maker/puppeteer.

Incidentally, Handspring is hoping to bring out a DVD of Woyzeck, including the animations, and there is to be a new season of Warhorse in London later in 2008. There’s just a chance I might around to catch it!

Articles I enjoyed reading about Handspring:

All the wild little horses

Horse sculptures

I loved making these two little horses recently for an up-coming theatre production, Emma’s Dynasty, by Jigsaw Theatre Company. They are based on an earthenware Chinese Han Dynasty horse that is here in the Australian National Gallery collection, but they are tiny in comparison, only 17 cm high at the head. I really like how stocky and wild the horse is, and how he looks like he has come to a screaming halt.

Horse

A while ago Andrew at PuppetVision linked to a super sculpey sculpting tutorial by Peter Konig, and it was really useful to me while I was doing the horses – thanks to you both! The tutorial is much more detailed than what I am going to write here – no sense repeating – and I can really recommend it.

The first steps were to make an armature using armature wire. In this case the strength the armature gives the legs and tail is particularly important. From the nose to the tail is one wire, and then the legs are separate wires, wired on with fine wire (Peter has close-ups on how to attach them), and set in place with Knead-It, a Selley’s two-part epoxy. You knead the parts together, and it sets as hard as a rock in five minutes – invaluable stuff!
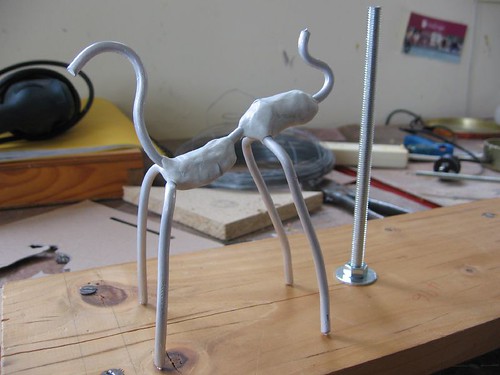
Horse sculpture

I also used wire and Knead-It to attach the armature to a firm stand. I struggle with being too impatient at the beginning of a project to go to the trouble of making a firm base like this, and I often regret it – and know I’m going to regret it, what’s more! However, I’m getting wiser about this, and decided to follow Peter’s advice, even though the horse was small.
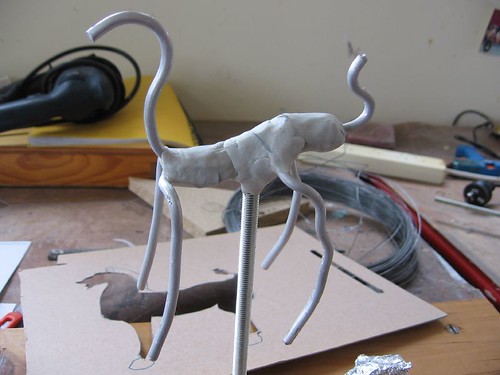
Horse sculpture

Another tip that I appreciated was to make a cardboard cutout of the silhouette of the horse to use as a reference while sculpting. I usually sculpt by eye, but this allows you to check how you are going.
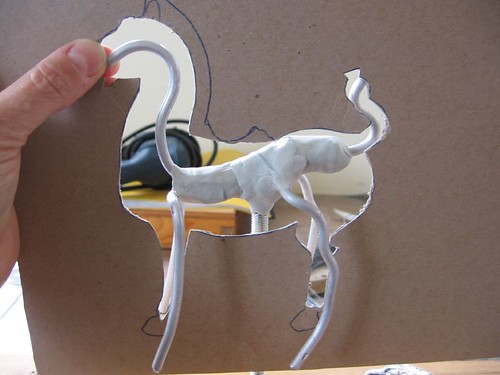
Horse sculpture

I padded out some of the bulkier parts of the body with aluminium foil, as a way of saving how much super sculpey I needed to use later. Wire is wound around the armature wires to give something for the modeling clay to grip onto.
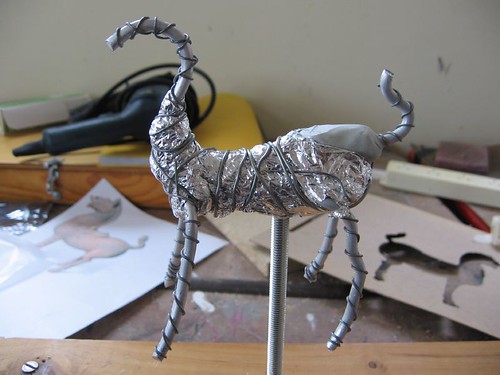
Horse sculpture

Now the best bit, the modeling! I’ve only recently started using Super Sculpey, and its a real pleasure to work with, because it remains soft for a long time and takes detail so well. Peter says to check it’s soft when you buy it, in case its been on the shelf a long time, and to keep it in a zip lock plastic bag.
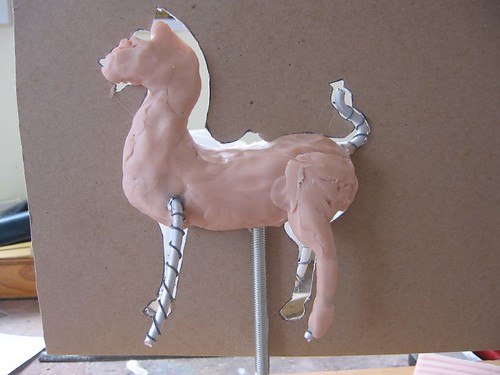
Horse sculpture

So she kneaded it and punched it and pounded and pulled till it looked okay… You can use mineral turpentine to gently bush the surface detail to smooth it, and almost model the tiny detail with the brush.

Horse sculpture

Into the oven to bake. I had trouble fitting it in my oven still attached to the stand, and ended up putting it in on its side. I thought trying to cut off the support before the horse was baked might risk the horse getting squashed. Maybe next time I should make it so it unscrews instead.

Horse sculpture

Sawing the support bolt off was a little tricky, but manageable. There were a few small cracks, but I gather this is quite common, and took Peter’s advice to fill them with sculpey and blast it for a few seconds with a heat gun, only in my case it was with a hair dryer. Instant glue is effective for mending breaks. Then, on to the second horse.

Horse sculpture

Super sculpey takes acrylic paint very well, and I used a dappled mix of greys and terracottas to get the final finish.

Horse sculptures

There are more photos here. I guess I got a bit carried away, but sometimes that just happens.
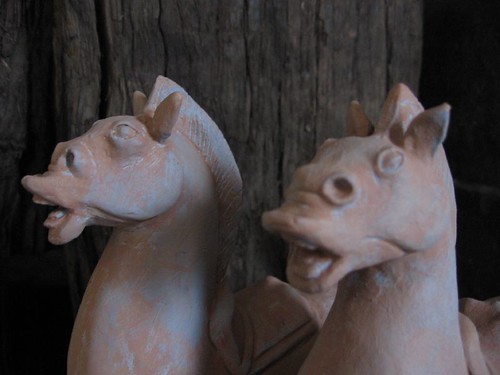
Horse sculptures

Flying ducks again

Painting

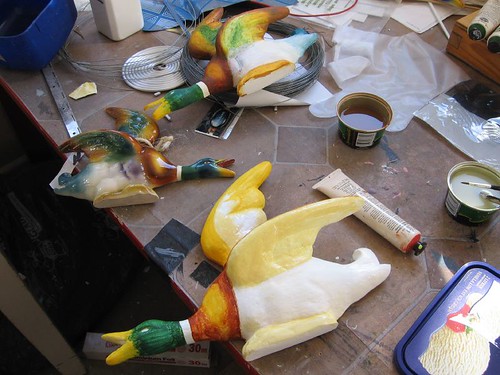
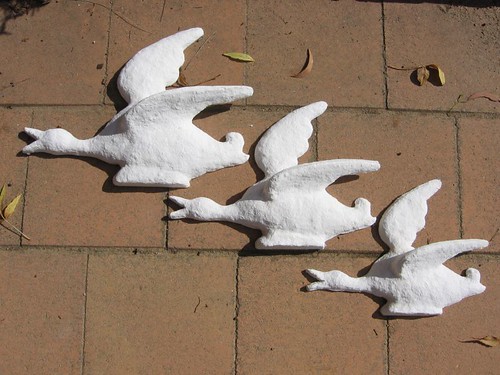
The ducks have progressed to the painting stage, and I should finish them today. When the paper mache dried fully, it somehow warped the necks and top wings slightly, so that the ducks didn’t sit flat against the wall, so I had to do a bit of surgery, making a cut in each tension point, and filling it to push the part back. I also spent quite a lot of time smoothing the surface and sanding and filing the feather shapes, as the paper mache doesn’t allow fine shaping, and dries just a little bumpy. It’s also proving tricky to get the glazed translucent look that the ceramic ducks have. I am putting a lot of hope in the final varnish!

Update:

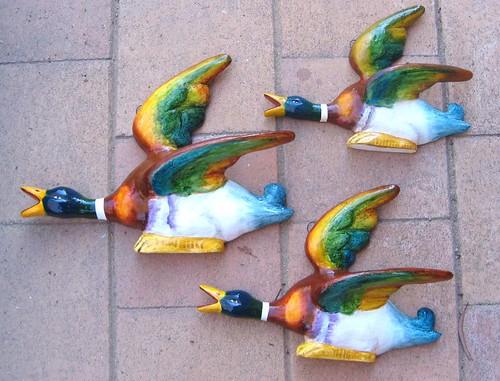
This is how they turned out. They are for “1 in A 100”, a play about mental illness (synopsis here) written by Mary Rachel Brown, directed by Carol Woodrow, design by Imogen Keen, at Canberra’s Street Theatre in May 2007.

IMG_3780-1

Flying ducks

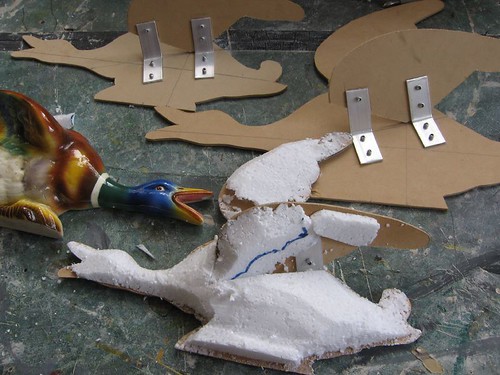
I’m working on several projects at once at the moment. One is making a set of those flying ducks that people had as wall ornaments when I was growing up. I’ve been lent a couple to model from, and looking at them up close I can understand their attraction, despite their kitsch reputation. Since the ones I am making are theatre props they only have to look like the real thing. Inside, they have an mdf structure, and I have bulked them out with polystyrene. I like carving styrene, except for the mess.
Flying ducks

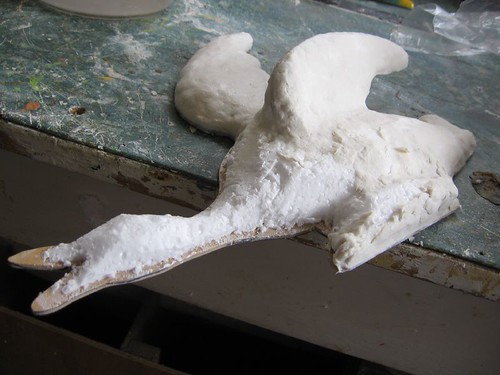
The next part of the process is covering the shapes with a commercial paper mache pulp. It starts as a dry mix, and when you add it to water it turns into a thick paste, which can be smoothed on and sticks to most surfaces. Here I’m half way through adding the paper mache to the big duck:

Flying ducks

The pulp takes a couple of days to dry, but I’m always impatient with things like this, and I have been hurrying it along by putting the ducks in the sun,

Flying ducks

and the oven:

Ducks in the oven

I’ll have to add more detail to the shapes, like the eyes, tails and feather patterns, and then its a matter of getting the surface smooth and painting it to look like china.

We have four beautiful white pet Indian Runner ducks, and it was funny to see them charging across the back garden in a line just as I was photograhing these in the kitchen.

The Moth Tree opens tomorrow night

Mothtree

Over the last while I have been involved in designing and making the set, costumes and puppets for Canberra Youth Theatre‘s production, The Moth Tree: An Awesome Adventure.

The Moth Tree is a quest story set in a distant place, in a quiet part
of the world, where the ancient and beautiful Algoma City lies. Since
the very beginning of time the city has been protected by moths that
grow on an enchanted tree. Until now the city has been a haven of
harmony and a place of gentle joy. However, a band of villains have
hatched a wicked plot to bring the city to its knees. All that stands
against the coming darkness are a ragged pair of unlikely young
heroes…

The play has been developed in a collaborative process involving the group of 8 to 12 year olds, the director, Tim Hanson, and the writer, Shiereen Magsalin, workshopping and developing characters and plot lines. The intention has been to offer the kids the experience of creating and presenting theatre, with a crew of professionals. We open tomorrow night! If you are in Canberra and have kids, why not take them along to some live theatre?