portfolio

Giant remote control snail

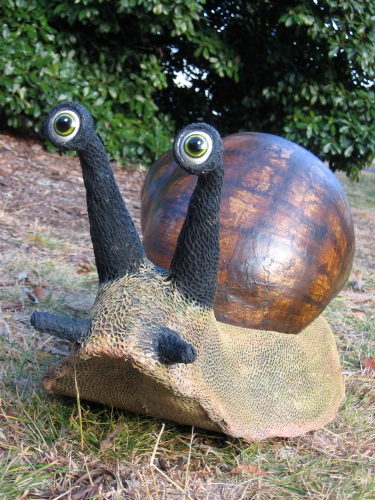
This is a giant remote control snail that I recently made for The Fool Factory for their promotion of National Science Week 2011. It’s about a metre long, fitted onto the chassis of a remote control car, and has eyes that move from side to side. It’s made to look somewhat like Australia’s largest land snail, the Giant Panda Snail, which inhabits sub-tropical forests in Queensland.

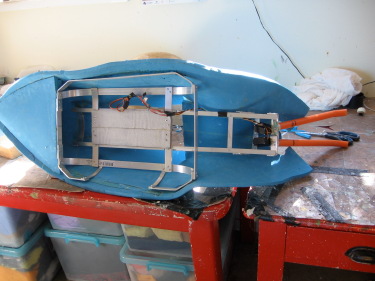
I’ve posted photos of the making process. The shell is shaped polystyrene layered with  paper mache, and then painted. The body is made from thin PE foam sheeting covered by a strange irregular and stretchy netted fabric which I used for the skin texture, then painted. Inside the snail there is a cage that separates and protects the body from remote control chassis, and a small aluminium structure that holds the servo motors that rotate the eyes.

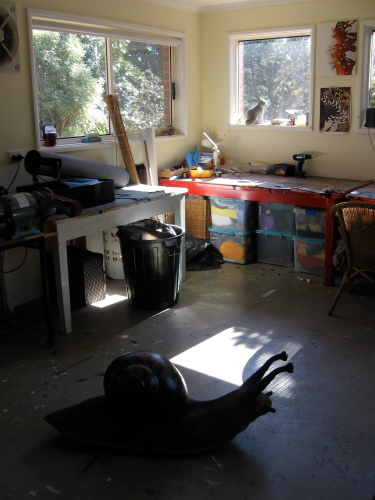
I’m also like the following picture of the snail in my studio, although it reminds me of when we first moved into our house and there was a small crack by the back door where leopard slugs used to come in during the night to eat the cat food in the laundry! Worse was when they used venture further into the house and we could accidentally tread on them barefoot if we were up in the night tending babies – eew!

Updating

Over Easter I finally got to do some updating of my whole site. There is still some fiddling around the edges to do, but I’m happy that my work portfolio is now up to date and will be easier to manage in future, and that all the old bad links have been stripped out of the other static pages.

I did somehow stuff up my Monkey See Monkey Do blog, and had to start up a new installation of WP for it, so I guess I’ve lost what little google juice it had. So if you are searching for things like how to slice a banana inside its skin, make tea towel chooks and jumping handkerchief mice, or whistle through your hands, it’s here, or you can use the nifty new navigation tabs at the top of the page.

Purse frame bags

Purse frame bags

These two bags are theatre props I made yesterday. They still need some handles and some special things happening inside them, but I am pleased with how they are coming on. There is some relief, too, as I had intended to buy a couple of bags and modify them, but couldn’t find any that were right. I also had trouble finding the purse frames here in Canberra. I resent the fact that most craft shops here now just have scrapbooking supplies.

I hadn’t made bags like this before, but looked up patterns online, and I am indebted to u-handbag for her purse frame demystified tutorial. Isn’t the web great?

All the wild little horses

Horse sculptures

I loved making these two little horses recently for an up-coming theatre production, Emma’s Dynasty, by Jigsaw Theatre Company. They are based on an earthenware Chinese Han Dynasty horse that is here in the Australian National Gallery collection, but they are tiny in comparison, only 17 cm high at the head. I really like how stocky and wild the horse is, and how he looks like he has come to a screaming halt.

Horse

A while ago Andrew at PuppetVision linked to a super sculpey sculpting tutorial by Peter Konig, and it was really useful to me while I was doing the horses – thanks to you both! The tutorial is much more detailed than what I am going to write here – no sense repeating – and I can really recommend it.

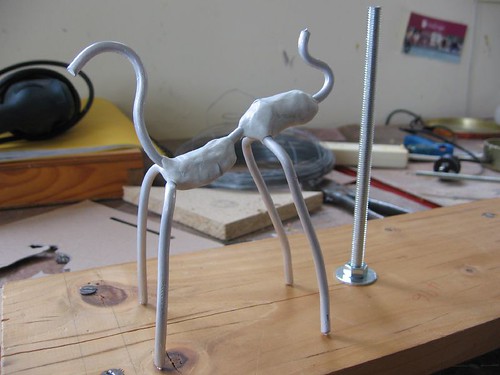
The first steps were to make an armature using armature wire. In this case the strength the armature gives the legs and tail is particularly important. From the nose to the tail is one wire, and then the legs are separate wires, wired on with fine wire (Peter has close-ups on how to attach them), and set in place with Knead-It, a Selley’s two-part epoxy. You knead the parts together, and it sets as hard as a rock in five minutes – invaluable stuff!
Horse sculpture

I also used wire and Knead-It to attach the armature to a firm stand. I struggle with being too impatient at the beginning of a project to go to the trouble of making a firm base like this, and I often regret it – and know I’m going to regret it, what’s more! However, I’m getting wiser about this, and decided to follow Peter’s advice, even though the horse was small.
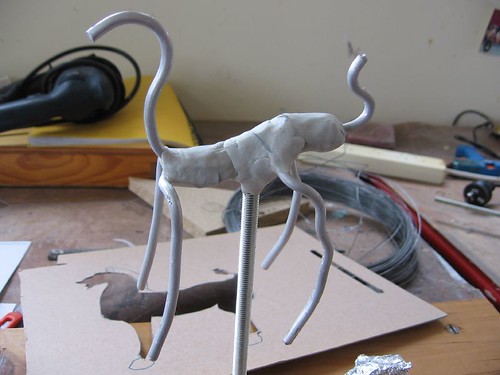
Horse sculpture

Another tip that I appreciated was to make a cardboard cutout of the silhouette of the horse to use as a reference while sculpting. I usually sculpt by eye, but this allows you to check how you are going.
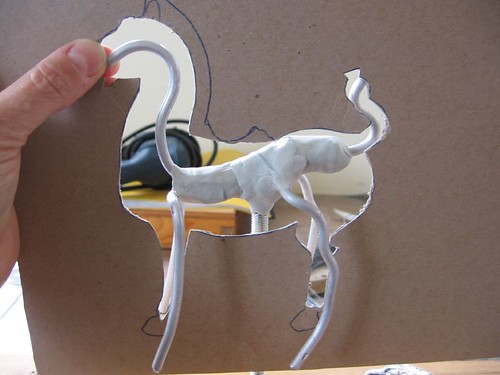
Horse sculpture

I padded out some of the bulkier parts of the body with aluminium foil, as a way of saving how much super sculpey I needed to use later. Wire is wound around the armature wires to give something for the modeling clay to grip onto.
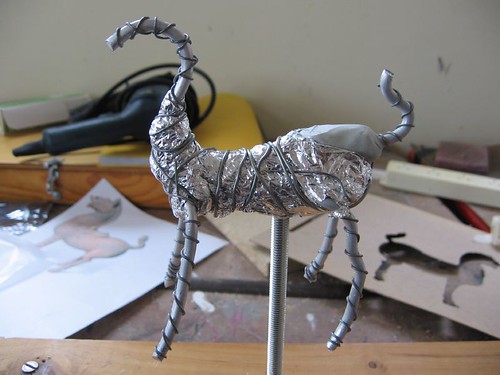
Horse sculpture

Now the best bit, the modeling! I’ve only recently started using Super Sculpey, and its a real pleasure to work with, because it remains soft for a long time and takes detail so well. Peter says to check it’s soft when you buy it, in case its been on the shelf a long time, and to keep it in a zip lock plastic bag.
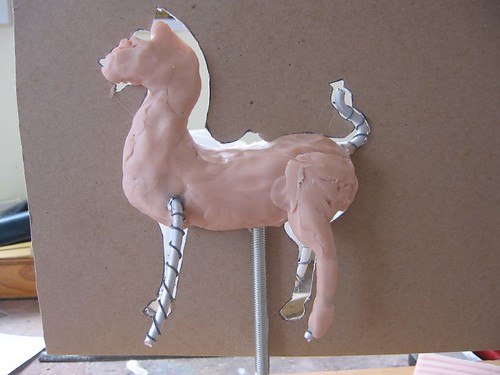
Horse sculpture

So she kneaded it and punched it and pounded and pulled till it looked okay… You can use mineral turpentine to gently bush the surface detail to smooth it, and almost model the tiny detail with the brush.

Horse sculpture

Into the oven to bake. I had trouble fitting it in my oven still attached to the stand, and ended up putting it in on its side. I thought trying to cut off the support before the horse was baked might risk the horse getting squashed. Maybe next time I should make it so it unscrews instead.

Horse sculpture

Sawing the support bolt off was a little tricky, but manageable. There were a few small cracks, but I gather this is quite common, and took Peter’s advice to fill them with sculpey and blast it for a few seconds with a heat gun, only in my case it was with a hair dryer. Instant glue is effective for mending breaks. Then, on to the second horse.

Horse sculpture

Super sculpey takes acrylic paint very well, and I used a dappled mix of greys and terracottas to get the final finish.

Horse sculptures

There are more photos here. I guess I got a bit carried away, but sometimes that just happens.
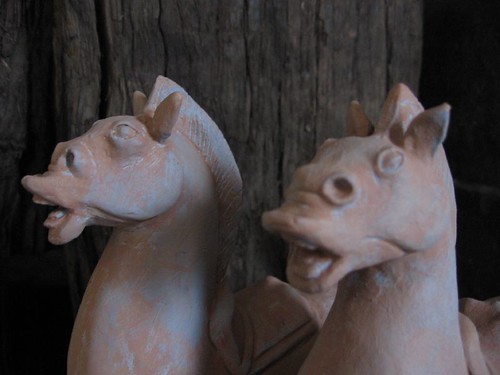
Horse sculptures

Flying ducks again

Painting

The ducks have progressed to the painting stage, and I should finish them today. When the paper mache dried fully, it somehow warped the necks and top wings slightly, so that the ducks didn’t sit flat against the wall, so I had to do a bit of surgery, making a cut in each tension point, and filling it to push the part back. I also spent quite a lot of time smoothing the surface and sanding and filing the feather shapes, as the paper mache doesn’t allow fine shaping, and dries just a little bumpy. It’s also proving tricky to get the glazed translucent look that the ceramic ducks have. I am putting a lot of hope in the final varnish!

Update:

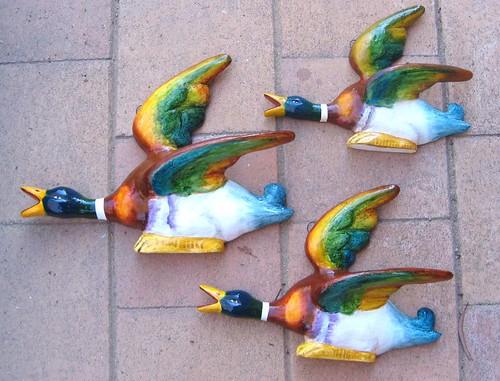
This is how they turned out. They are for “1 in A 100”, a play about mental illness (synopsis here) written by Mary Rachel Brown, directed by Carol Woodrow, design by Imogen Keen, at Canberra’s Street Theatre in May 2007.

IMG_3780-1

Flying ducks

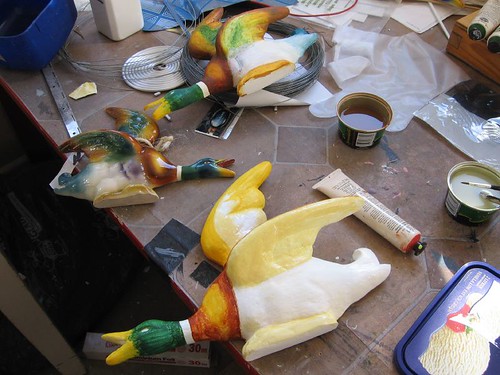
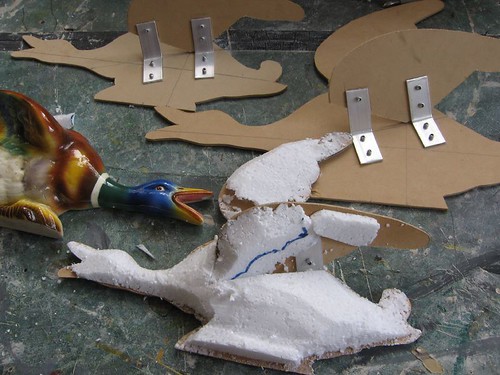
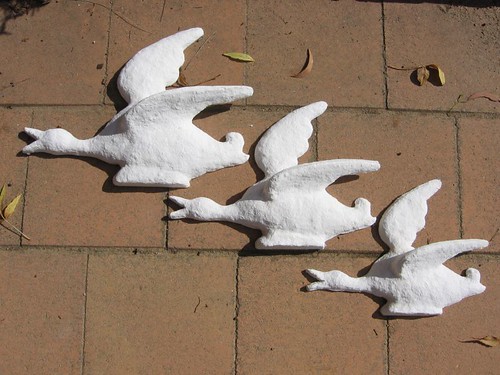
I’m working on several projects at once at the moment. One is making a set of those flying ducks that people had as wall ornaments when I was growing up. I’ve been lent a couple to model from, and looking at them up close I can understand their attraction, despite their kitsch reputation. Since the ones I am making are theatre props they only have to look like the real thing. Inside, they have an mdf structure, and I have bulked them out with polystyrene. I like carving styrene, except for the mess.

Flying ducks

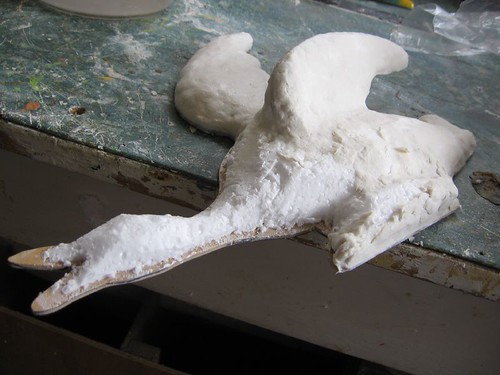
The next part of the process is covering the shapes with a commercial paper mache pulp. It starts as a dry mix, and when you add it to water it turns into a thick paste, which can be smoothed on and sticks to most surfaces. Here I’m half way through adding the paper mache to the big duck:

Flying ducks

The pulp takes a couple of days to dry, but I’m always impatient with things like this, and I have been hurrying it along by putting the ducks in the sun,

Flying ducks

and the oven:

Ducks in the oven

I’ll have to add more detail to the shapes, like the eyes, tails and feather patterns, and then its a matter of getting the surface smooth and painting it to look like china.

We have four beautiful white pet Indian Runner ducks, and it was funny to see them charging across the back garden in a line just as I was photograhing these in the kitchen.

The Moth Tree opens tomorrow night

Mothtree

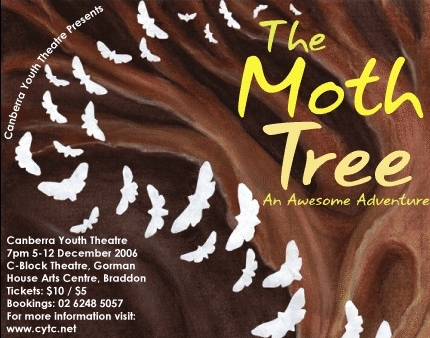
Over the last while I have been involved in designing and making the set, costumes and puppets for Canberra Youth Theatre‘s production, The Moth Tree: An Awesome Adventure.

The Moth Tree is a quest story set in a distant place, in a quiet part
of the world, where the ancient and beautiful Algoma City lies. Since
the very beginning of time the city has been protected by moths that
grow on an enchanted tree. Until now the city has been a haven of
harmony and a place of gentle joy. However, a band of villains have
hatched a wicked plot to bring the city to its knees. All that stands
against the coming darkness are a ragged pair of unlikely young
heroes…

The play has been developed in a collaborative process involving the group of 8 to 12 year olds, the director, Tim Hanson, and the writer, Shiereen Magsalin, workshopping and developing characters and plot lines. The intention has been to offer the kids the experience of creating and presenting theatre, with a crew of professionals. We open tomorrow night! If you are in Canberra and have kids, why not take them along to some live theatre?

Giant cross-section flower

Cross-section flower

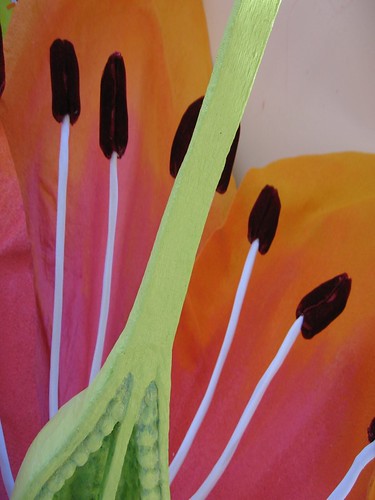
My third project for Floriade was making a giant model flower in cross-section, to be the central display in CSIRO’s Division of Plant Industry’s information tent. I really enjoyed making this, too. Some projects go really easily and this was one of those!

The petals were the main challenge, but I decided pretty quickly to use a molded felt technique that I had previously tried with some masks. Essentially you saturate felt in white PVA glue, mold it to the shape you want, and then let it dry. It adopts the shape and becomes fairly hard and plasticised in a way. You can paint it, too, and the way the paint bleeds through the felt can be used in different ways, some quite sensuous. In this case, I made a petal shape in clay and each petal had a double layer with some aluminium flat bar running up the middle to give it extra rigidity. The interesting thing about the technique apart from the obvious texture, is that the felt can be stretched and pulled but remain in one piece. In this respect natural wool felt is much better to work with because it pulls and moves much more than synthetic felt. But synthetic is okay if you don’t have a choice.

I think the flower may end up being displayed in the CSIRO Discovery Centre, where some of my insect models are too; I hope so.